
A dog that slides while you reach for a paw has an extra reason to pull away. A safe nail trim begins with the environment: firm footing, clear light, reachable tools, and a position your dog chooses. This guide focuses on setting up a comfortable station before the clipper touches a nail. It is not a shortcut to restraint or a promise that fearful dogs will accept grooming immediately. If a dog is panicked or painful, pause and involve a veterinary professional instead of building a more restrictive setup. See our veterinary disclaimer for pet health questions.
Start with flooring that prevents sliding
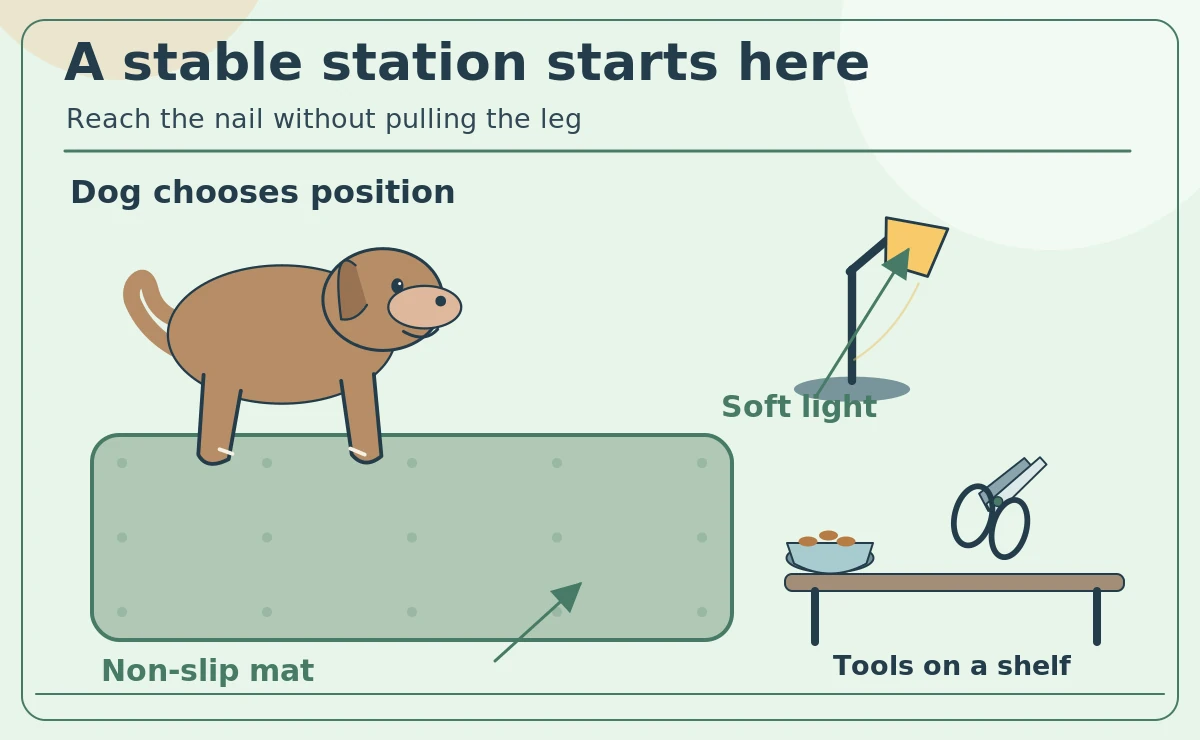
Place a flat, non-slip mat on a stable floor. Press on the corners and walk across it yourself to check that it does not bunch or move. For large dogs, give enough room to stand with all paws on the surface. Avoid putting a nervous dog on a raised table just to make the task easier for your back. A dog that chooses to lie down needs an equally steady spot. The goal is confidence underfoot, not forcing the dog into a fixed pose.
Set the lighting before bringing out clippers
Use bright, even light that makes the nail tip visible without shining harshly into the dog’s eyes. A movable lamp can help if it remains secure and its cord stays away from feet. Check for shadows caused by your hand or the tool. On dark claws, light may improve your view of the nail surface but cannot make the quick visible through opaque material. Never use an illuminated clipper as proof of safety. If you cannot identify a conservative tip, ask for an in-person demonstration.
Keep tools within reach and blades protected
Lay a sharp, correctly sized pet clipper or file on a clean nearby tray, out of the dog’s reach. Include a few familiar small treats and a clean cloth. Keep an appropriate pet styptic product available according to its label, but do not treat it as permission to cut deeply. Close or cover clipper blades when not in use. If you use a grinder, position its cable and charging equipment safely away from water, loose fur, and the dog’s paws. Avoid clutter near the station.
Let the dog choose a comfortable body position
Some dogs prefer standing. Others may calmly sit or lie on their side. Observe how the dog places its weight and support a paw within its comfortable natural range. Do not pull a leg across the body or force a dog into a rollover. A larger dog may be easier to groom at floor level; a small dog may prefer a familiar low surface. The correct position is one that keeps the dog stable and allows a quick pause. Never tie or pin a resisting dog in place.
Introduce the station without trimming
Invite the dog onto the mat, reward approaching or standing calmly, and let the dog step off. Repeat before adding paw touch. On later sessions, glide a hand down the shoulder toward the foot, then release. Let the dog inspect closed clippers or an off grinder. For a grinder, train the sound at a distance separately. Short voluntary practice helps reveal whether your dog dislikes the floor, the equipment, or paw handling itself. Work below the point where the dog becomes overwhelmed.
Use a clear pause cue that the dog controls
A cooperative-care pause can be as simple as the dog moving away, lifting its head sharply, or withdrawing the foot. Respond immediately by releasing the paw and putting the tool down. Do not call the dog back insistently. Some dogs can learn to rest their chin or offer a paw to start, but these signals should remain optional. If the dog freezes, growls, repeatedly licks its lips, or struggles, treat that as an instruction to stop. The objective is willing participation, not stillness at any cost.

Support the paw rather than stretching it
When your dog remains comfortable, gently cradle the foot and expose one nail. Keep the wrist and toes close to their normal walking alignment. Avoid squeezing between pads or folding the leg backward. Check that fur is out of any moving grinder parts. If support causes the dog to lose balance, change the position or stop. A helper should manage rewards and observe body language, not overpower a dog to hold the paw. Let go between small attempts so the dog can relax.
Spot the difference between a safe and risky station
A useful station has flat traction, enough body room, a lamp aimed at nails, and tools off to one side. The dog can step away. A risky station has a slippery tabletop, dangling power cord, loose tools near the edge, or a helper gripping the dog tightly. A crowded room adds noise and distractions. Check the scene from the dog’s height before you begin. Set up where you can see the nail and the dog’s face at the same time.
Make a single-nail session worthwhile
When the dog voluntarily settles, approach one clearly visible nail. If it is safe and necessary to trim, take only a tiny amount, then release and reward. You do not need to finish a paw, and you should never try to correct a long nail in one deep cut. Practice sessions without clipping still build comfort with the station. Close the clipper, put equipment away, and let the dog leave calmly. Record what position and lighting worked rather than counting the number of nails completed.

Clean and reset the station after grooming
Collect nail pieces, wipe down the mat, and clean tools as directed by their manufacturer. Keep electric equipment dry and let it cool. Check the mat for frayed edges and the clipper for dull or loose blades. Store tools where pets and children cannot reach them. If fur or nail dust collected near the grinder, clean the area before the dog returns. A simple reset reduces trip hazards and makes the next session predictable. Keep a note of any newly sensitive toe.
When a home station is not enough
Broken nails, swelling, limping, persistent bleeding, or fear severe enough to make safe handling impossible require veterinary input. Ask your clinic to demonstrate paw positions and discuss low-stress nail care. If a dog resists strongly, do not buy stronger restraint equipment as the next step. Review comfort, pain, and a gradual training plan instead. The mat and lamp support precision, but they cannot replace professional judgment about the quick or painful paws. Stop before either handler or dog is at risk.
How We Research
We reviewed independent veterinary guidance and animal-welfare resources on dog nail trim station. We separated ordinary preventive care from painful or abnormal nail conditions and checked that each illustration shows a conservative action rather than a precise cut line. The diagrams are conceptual and cannot identify the quick in a real pet. We favor gradual, voluntary handling and referral when the toe, claw, or behavior is abnormal. Learn more about our editorial approach.
Sources
Successful Nail Trims: Training for Happy Handling — VCA Animal Hospitals — https://vcahospitals.com/veterinary-care/primary/know-your-pet/handling-exercises-for-trimming-nails-and-brushing-teeth (accessed October 2026).
Taking the Stress out of Nail Trimming for Dogs — VCA Animal Hospitals — https://vcahospitals.com/know-your-pet/nail-trimming-for-dogs (accessed October 2026).
Purdue Canine Welfare Science — Nail Trimming for Dogs — https://caninewelfare.centers.purdue.edu/resource/nail-trimming-for-dogs/ (accessed October 2026).
VCA Animal Hospitals — How to Trim a Dog’s Nails at Home — https://vcahospitals.com/know-your-pet/how-to-trim-a-dogs-nails (accessed October 2026).
Safety note: Stop handling if your pet becomes distressed. A claw embedded in skin, significant bleeding, severe pain, or a newly abnormal paw warrants veterinary assessment; an illustration cannot diagnose a problem.
Not necessarily. A stable floor-level non-slip mat is often easier, especially for large or worried dogs. Avoid raised surfaces without safe access and supervision.
Bright even light helps you see the nail surface but cannot reveal the quick through dark pigment. Trim conservatively or seek a demonstration.
No. A helper can offer rewards or observe body language, but forceful restraint increases fear and the chance of injury.
Paw withdrawal, body tension, repeated lip licking, freezing, growling, or leaving the mat mean stop and release the paw.
Keep a sharp pet-appropriate tool, safe rewards, a cloth, and relevant first-aid supplies accessible but away from the dog’s reach.