
If you are wondering how to trim kitten nails, begin by checking whether your kitten needs a trim and whether the animal will accept gentle paw handling. A young kitten may have fine, sharp tips yet still need time to learn that touching the paws is safe. You do not have to finish all four paws in one sitting. The goal is a cooperative routine, a clear view of the nail tip and an easy way to stop. This guide covers the first sessions for a healthy kitten; ask your veterinarian about medical concerns and read HubPet’s veterinary disclaimer.
Decide whether trimming is actually needed
Watch how your kitten uses a scratching surface and moves around the home. Meanwhile, claws help cats grip, climb and express normal scratching behavior, so the aim is not to blunt every nail automatically. An indoor kitten that snags fabric or accidentally scratches during calm handling may benefit from a conservative tip trim. Outdoor access changes the calculation because cats may depend on claws for climbing and escape. A claw that curls toward the pad, causes limping or looks damaged needs veterinary assessment rather than an ambitious home session. Let the kitten’s comfort and the condition of each nail guide the decision.
Prepare a low-stress space and a clear light
Choose a quiet room with a stable floor, a soft towel and bright indirect light. Therefore, keep the kitten’s familiar bed nearby, but do not trap the animal in a corner. A small cat-specific scissors-style clipper with sharp blades offers controlled movement; a clumsy oversized tool can obscure the tiny nail. Place treats within easy reach before you begin. Ask a calm helper to offer rewards if your kitten already enjoys being handled, yet avoid having someone pin the kitten down. Practice opening and closing the clipper away from the kitten so the sound does not arrive as a surprise.

Teach paw touches before showing the clipper
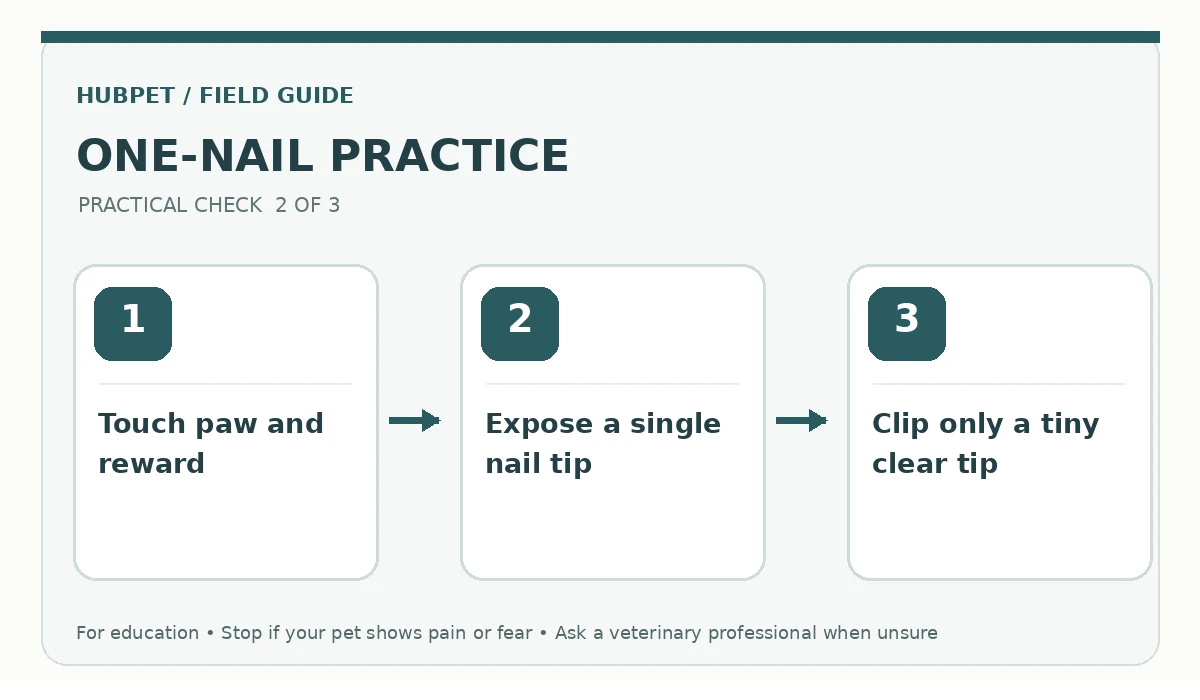
During normal relaxed moments, briefly touch one shoulder, move down the leg and stroke a paw. Reward and release immediately. On a later trial, support the paw for a second without pulling it forward. Also, progress to touching a toe pad only while the kitten stays loose and curious. Stop if the paw withdraws repeatedly or the kitten turns tense. This preparation can take multiple days; it is not a failed trim if today ends with one comfortable touch. A predictable cue before handling can help the kitten understand what will happen next.
Learn where the sensitive quick begins
A kitten’s nail has a hard outer tip and living tissue nearer its base. Also, under good light, the quick often looks pink through a pale claw. Do not cut into that area: it contains blood vessels and nerves. Press very gently on the pad to extend just one nail, then let the toe relax. If you cannot see a safe margin or the kitten wriggles, skip that nail. Removing only the thin sharp hook is enough for an early practice trim. A veterinarian or trained nurse can demonstrate the nail boundary in person if you are unsure.
Make the first cut smaller than you expect
Offer a reward, bring the clipper to the end of one exposed claw and remove only a tiny translucent tip. Next, keep the tool oriented so it does not crush the sides of the nail. Release the paw as soon as the clip is complete and reward again. You may stop after that single success. Inspect the nail rather than attempting to reach a predetermined length; a smooth tiny removal is preferable to a painful close cut. Never use force to chase a paw that the kitten has pulled away. Calm handling is part of the outcome, not merely a prerequisite.
Use the kitten’s behavior to set session length
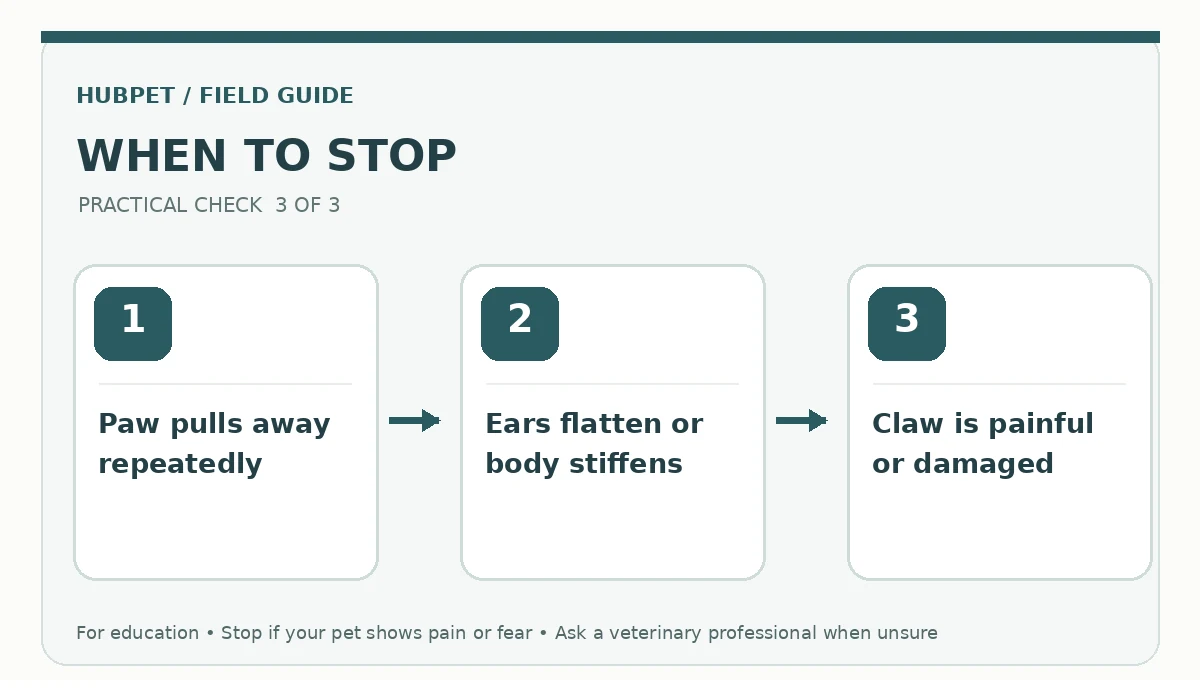
Look for soft posture, voluntary approach and willingness to take a favorite treat. As a result, flattened ears, rapid tail flicks, hiding, growling or repeated attempts to leave mean you should end the session. A motionless kitten is not necessarily relaxed; check the whole body rather than reading stillness as permission. Pause between paws and offer a play break if the kitten enjoys it. Younger animals often have short attention spans, so several brief sessions can be easier than one extended grooming event. Never punish a kitten for resisting. Choose a quieter moment another day.
Make a repeatable plan for later trims
Check nails during ordinary grooming and compare how they look and catch on fabric over time. By contrast, some indoor cats benefit from trims at roughly two-to-four-week intervals, but individual activity and outdoor needs matter more than a calendar alone. Keep a simple note of which paws were handled comfortably and which need slower practice. Revisit the smallest successful step before advancing. Pair the routine with scratching posts, play and suitable resting spots; nail trimming does not replace opportunities to scratch. If your kitten becomes harder to handle, shorten the sessions rather than tightening restraint.
Know when home trimming is the wrong option
If a claw looks split, swollen, infected or embedded in the pad, leave it to veterinary care. For example, likewise, if the kitten has severe fear, bites defensively or cannot be handled without force, ask for a demonstration or a gentle handling plan from your veterinary team. If you accidentally nick the quick, stop immediately and use the first-aid advice given by your veterinarian; persistent bleeding or marked pain needs prompt professional attention. Never improvise sedation. For a healthy kitten, a calm one-nail session today can build a safer grooming habit for years.
A practical pre-trim and post-trim checklist
Before starting, confirm the kitten is awake but settled, the room is quiet, the clipper is sharp and the quick is visible. However, keep a treat ready and decide in advance that you can quit after one nail. After a clip, check the toe for bleeding or splitting, place the tool out of reach and allow the kitten to move away. If the kitten returns for play or a snack, you ended on a positive note. Record one improvement for next time, such as accepting a brief toe touch. Avoid judging success by the number of claws trimmed.
How We Research
Our editorial review compared veterinary and animal-welfare guidance on healthy claws, handling tolerance, tools, and reasons to seek professional help. Practical owner decisions took priority over product claims. We did not conduct controlled tool trials, test specific brands, or provide diagnoses. Guidance may vary by age, lifestyle, anatomy, and stress response; ask a veterinarian about individual needs. We last reviewed the sources on October 27, 2026. Read about our editorial process on the About HubPet page.
Sources
VCA Animal Hospitals: Kitten grooming and nail care. Accessed October 27, 2026.
Cornell Feline Health Center: Choosing and caring for a new cat. Accessed October 27, 2026.
Cats Protection: Grooming your cat. Accessed October 27, 2026.
Often yes, when a nail needs a tiny tip trim and the kitten accepts calm handling. Ask a veterinarian to demonstrate if you cannot identify the quick.
No. One comfortable nail trim can be a successful first session. Work across several short sessions while maintaining the kitten’s trust.
In many pale claws, the quick looks pink near the base. Remove only a tiny outer tip and stop if the safe boundary is unclear.
Do not force a struggling kitten through a trim. Return to brief paw-touch practice or seek a low-stress demonstration from the veterinary team.
No. Scratching supports normal claw upkeep, but you should still examine nails for snagging, curling or discomfort and ask for help when needed.