
A double-ended leash has a clip at each end and often includes rings that let you vary the handle length. You may connect its clips to compatible front and back harness rings. Some designs also fold into a single lead. Those options can help, but extra metal and routing also create more chances for twists. Use this guide to distinguish actual two-point walking from simply clipping one dog to another dog’s equipment. This article explains general gear selection, not individualized veterinary advice. If the dog shows neck pain, breathing trouble or persistent rubbing, stop using the item and ask your veterinarian. See our veterinary disclaimer.

Identify the two functional ends
Spread the leash flat on a floor before putting it on the dog. Find each snap hook, each adjustment ring and any handle or sliding portion. Read the manufacturer’s intended configurations. A fixed two-clip lead may not adjust for every walking arrangement. Both hooks should close fully and independently. The second clip does not make a faulty first clip safe. Never attach either clip to a loose ID ring. Look for a clearly stated loading path through sewn or properly fastened connections.
Use only approved harness attachment points
For two-point control, use the front and back rings on the same well-fitting harness. Check that its manufacturer supports both connections. Never attach a lead to an improvised strap or fragile accessory loop. Avoid arrangements that transfer pulling force to the neck. Check that the chest strap does not drag into the armpits when tension changes. The dog should still walk and turn naturally. If the two points pull the torso sideways or shorten the dog’s stride, adjust the setup or stop using it.
Understand how much control the design provides
Two attachments can change the direction of tension. Yet the leash cannot teach calm walking without training. Do not use it as a pulley to jerk the dog into position or force the shoulders around. Keep a soft hand and reward voluntary check-ins. If the dog has a history of strong lunging, sudden panic or pain, ask a qualified reward-based trainer and veterinarian about an appropriate plan. The extra hardware may complicate handling for someone who needs a very simple release.
Trace the route of both leash sections
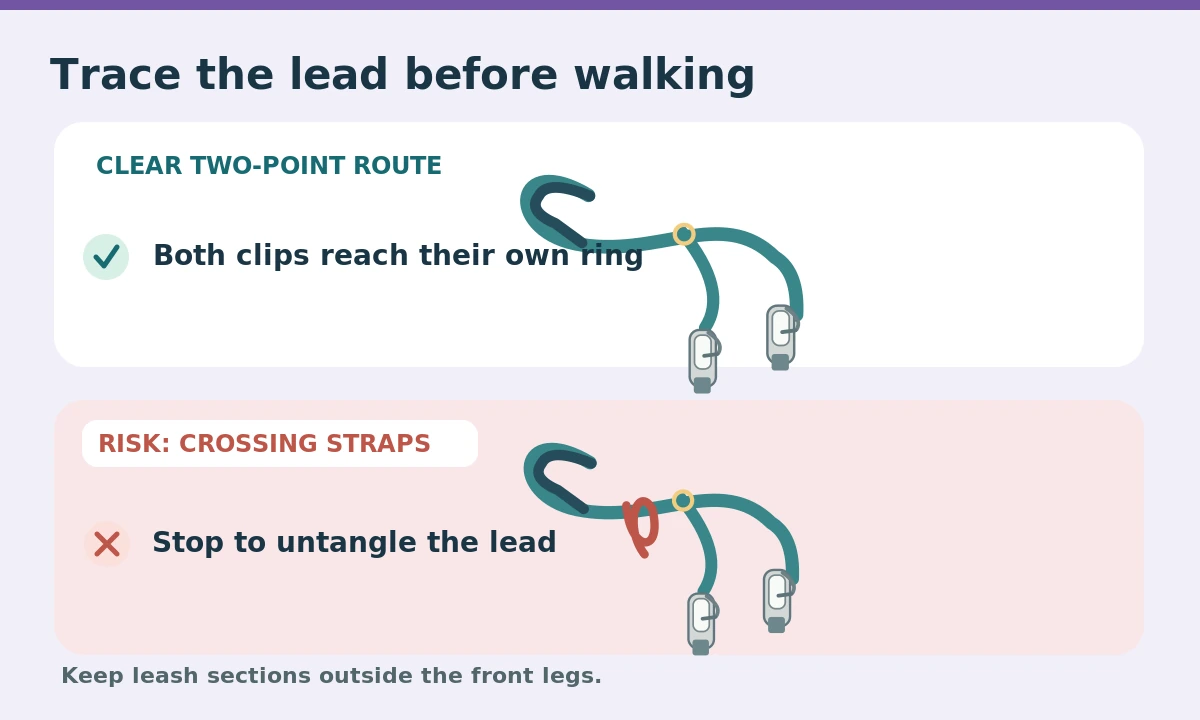
With the dog standing still, confirm that the lead runs outside the front legs and does not pass under the chest or between the paws. Let the dog take a few steps, then stop and inspect again. Turning or circling can twist the line around the chest, especially with long floating sections. Reposition before a tangle tightens. Do not use a double-ended lead to tether an unattended dog. Avoid wrapping it around your waist unless the maker specifically permits that use.
Inspect adjustment rings and stitched loops
Check that an adjustment ring cannot slip past a stopper or slide across an unreinforced seam. Lay the product under light hand tension, without the dog attached, and note which sections actually bear the load. Sewn loops should have complete stitching without skipped areas or torn edges. Avoid hardware that catches in fur or knocks against the dog’s legs. If changing length requires a complicated sequence of ring swaps, practice indoors before entering a busy location. Simplicity during a surprise matters.
Compare two-point and single-point walking
An ordinary back-clip connection may offer the cleanest line route for calm dogs in open spaces. Two-point connection can give another handling option but introduces an additional front clip near the legs. Some leashes fold into a shorter single lead or handle. Use only the configurations the maker supports. Do not confuse a two-point lead for one dog with a coupler intended to walk two dogs. Different tension, clearance and equipment checks apply to each arrangement.
Introduce the extra line calmly
Let the dog sniff the equipment, then clip and unclip once while rewarding stillness. Begin with a few steps in a low-distraction setting and keep the line loose enough for normal movement. Practice turning left and right without crossovers, then pause for a harness contact check. If the dog tries to chew the extra strap or repeatedly steps through it, simplify to a single-point leash instead of repeatedly correcting the dog. Encourage comfortable walking habits regardless of equipment choice.

Make a pre-walk sequence repeatable
Before every walk, inspect both gates and attachment rings, check the harness fit, follow the lead with your eyes from one clip to the other and locate your hand grip. Ask the dog to walk several steps while you confirm no strap contacts the elbow or underside. Recheck after a stop, jacket adjustment or vigorous play. If either clip sticks, a seam loosens or a ring bends, retire the leash. The right leash is one you can deploy quickly and consistently without confusion.
How We Research
We reviewed guidance from the American Kennel Club, SPCA of Texas, and RSPCA on collar fit, leash handling, and walking visibility. These sources inform the fit, movement and safety checks in this guide. We have not tested or endorsed specific commercial products. Follow each maker’s instructions on size, cleaning, charging and approved attachments. For our editorial method, see About HubPet. Ask a veterinarian about pain, rubbing or injury.
Sources
American Kennel Club — Choosing the Right Collar for Your Dog — background on equipment fit, handling, and practical walking safety.
American Kennel Club — Dog Gear Measuring Guide — background on equipment fit, handling, and practical walking safety.
SPCA of Texas — Choosing the Right Collar and Leash — background on equipment fit, handling, and practical walking safety.
RSPCA — Walking Your Dog Safely — background on equipment fit, handling, and practical walking safety.
RSPCA — Winter and Low-Light Dog Walking — background on equipment fit, handling, and practical walking safety.
Yes, only when the leash and harness are designed for compatible front and back attachment points.
No. It may provide another handling option, but comfortable fit and reward-based training remain necessary.
Avoid arrangements that put sudden pressure on the neck. Follow the makers’ approved attachment instructions.
Route the line outside the legs, start with slack and stop to untangle it before tension increases.
No. A two-point connection on one dog and a coupler between two dogs are different tools.