
This article offers general pet-care and hygiene information, not individualized veterinary advice. For persistent diarrhea or illness, contact your veterinarian. See our veterinary information disclaimer. A dog poop scooper touches one of the dirtiest areas of the yard, but its handle often enters a garage or mudroom. Waste can hide behind a rake joint, beneath the lip of a collection tray, or inside a claw grabber spring. A quick hose spray may leave residue in those spots. This article covers a separate cleaning routine for waste tools, from removing visible material to drying and storage. It explains the difference between ordinary washing and disinfecting without prescribing a one-size-fits-all chemical mixture. Follow the product and cleaning-agent labels, keep pets away, and avoid food-preparation areas.

Set up a dedicated washing area
Choose an outdoor or separate utility cleaning space, not a kitchen sink or food counter. Put on suitable gloves and gather a dedicated brush, mild soap or cleaner allowed by the tool manufacturer, and a container for waste. Keep the dog and children out of the area. Place the scooper in a washable tray while you inspect it instead of leaning it against a household surface. If you need a laundry sink, clean the sink afterward as CDC describes. Never rinse solid feces into a storm drain or an area where pets play.
Remove solids before adding cleanser
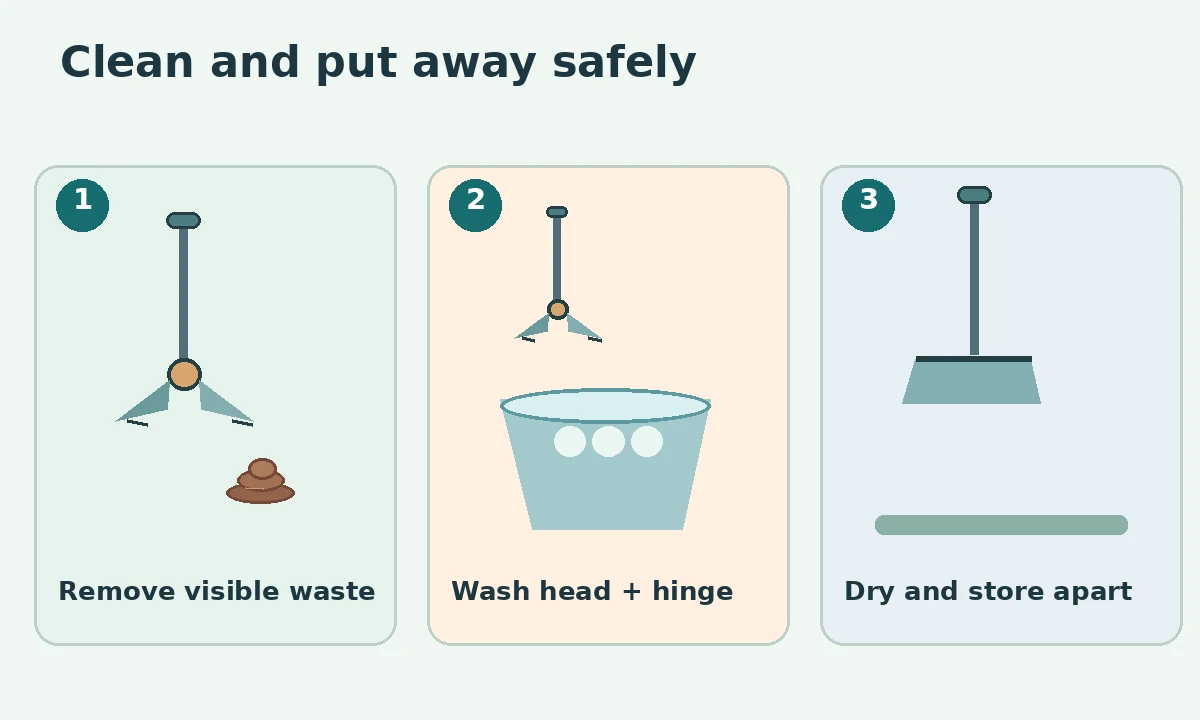
Use a disposable item or designated tool to collect visible waste into a bag, then place it in the appropriate trash. Look underneath the collection pan and along the back edge of the scoop. If material is stuck, loosen it with water and a separate brush rather than scraping dangerously toward your hand. Narrow corners in the head can keep dirt beyond the reach of a quick rinse. Complete this stage before applying any disinfectant because organic debris can prevent a product from working as intended. Keep splashing low and avoid spraying contaminated droplets toward doors or drinking bowls.
Open and inspect moving parts
Jaw grabbers have pivot pins, springs, and sliding rods. Swivel-bin systems have hinge bearings, while rake teeth join a support spine. These are natural places for trapped waste. Operate the cleanable mechanism slowly over the wash tray and check where residue collects. Do not dismantle a spring-loaded device unless its manufacturer provides safe instructions. If a hinge cannot be accessed, follow the maker’s procedure or consider a simpler replacement tool. Small cracks that trap debris may mean the part is no longer reliably washable. Never pinch a fingertip in a closing jaw.
Wash with soap and water first
Use warm water and a suitable soap or detergent on surfaces the manufacturer allows you to wet. Scrub the working edge, underside, joint covers, and handle grip with the dedicated brush. Rinse thoroughly without directing runoff toward edible plants, pet bowls, or walkways. For wooden handles or tools with sealed electronics, avoid immersion unless the product specifically permits it. Check that no soap remains in the hinge pocket. Washing removes soil and many germs physically; it is not the same process as chemical disinfection. Drying a visibly dirty head will not make it clean.

Choose disinfection only when appropriate
CDC recommends following the product label for any disinfectant, including how to prepare it, its contact time, rinsing, and when pets may return. Cleaning first is important. Do not mix bleach with ammonia or other cleaners, and do not invent a stronger solution because the tool touched feces. Some plastic, aluminum, and painted surfaces may be damaged by an incompatible product. If a pet is ill, ask your veterinarian about any additional sanitation needed. A disinfectant claim does not replace thorough cleaning of deep joints, and no treatment is safe to leave wet around pets without following its label.
Dry the joints, not just the handle
Tip the head so water drains out of pockets and hinges. Open moving parts as allowed and let air reach hidden surfaces. Wipe the shaft and handle grip with a clean dedicated cloth; then check that no water remains near springs or fasteners. Storing a wet tool in a closed plastic tote can cause odor or corrosion. Avoid laying the dirty end on an indoor floor to dry. If the handle telescopes, extend it according to the maker’s instructions so trapped moisture can escape. Let all parts dry before snapping them into a compact storage position.
Compare cleanable and damaged designs
A smooth, intact plastic jaw can be washed along its entire edge. A cracked jaw with trapped debris behind a sharp split is different. Likewise, a rake with firmly attached tines is easier to inspect than one with loose teeth. Do not hide a crack with tape; it can form another seam that collects contamination. Inspect metal for rust and sharp burrs before reuse. If a handle or joint repeatedly traps waste and will not dry, replacement may be more practical than repeated harsh cleaning. Choose a simpler tool next time if the current one is unmanageable.
Store away from clean pet supplies
Keep the washed, dry scooper in a clearly designated rack or tray, not alongside leashes, toys, or food containers. Arrange the head so children cannot touch sharp edges and the dog cannot chew the handle. Do not put damp waste bags into the same storage basket. An outdoor covered location may help if it remains dry and protected from weather damage. Make the cleaning brush and tray part of the same dedicated kit. If several people use the tool, leave a simple reminder to empty and wash it before it goes back.
Build a short after-use check
After each pickup, remove visible material, bag the waste, and assess whether the head needs a full wash. After washing, check hinges, teeth, handle integrity, and dryness. Wash your hands with soap and water after the task, even if you wore gloves. Every so often, inspect the storage tray for unnoticed residue. If waste keeps collecting in inaccessible spaces, consider replacing the tool rather than adding stronger chemicals. This repeatable routine protects the household from tracking contamination while keeping the scooper in usable condition.
How We Research
We compare public health and animal-care guidance with the visible features that an owner can actually inspect, such as the pickup edge, closure, hinge, or washing surface. We keep disposal rules separate from product marketing and explain when local collection instructions or manufacturer-specific guidance control the choice. These illustrations are explanatory diagrams, not product certifications. Learn more about our editorial approach.
Sources
CDC — Cleaning and Disinfecting Pet Supplies — Source guidance on waste handling, sanitation, environmental limits, or equipment care.
Handwashing After Animal Cleanup — CDC — Source guidance on waste handling, sanitation, environmental limits, or equipment care.
Keeping People Healthy Around Pets — CDC — Source guidance on waste handling, sanitation, environmental limits, or equipment care.
Use a dedicated outdoor wash area or separate utility tub when possible; CDC advises avoiding kitchen food-preparation areas for contaminated pet items.
Not if residue remains. Remove solids and wash soil away; disinfect separately when indicated and as the label directs.
No. Mixing products can release dangerous fumes. Follow the label and never combine cleaners.
Use manufacturer-approved cleaning steps. If it cannot be cleaned or has cracks, replace the damaged tool.
Yes. Wash thoroughly with soap and water after waste cleanup and after removing gloves.