
This is a paper-only science lesson for a U.S. family with pets, not veterinary advice, wildlife handling guidance, or a field experiment. Keep drawing supplies and paper scraps out of your dog’s reach. If a pet ingests a craft item or shows concerning symptoms, contact a veterinarian; see our veterinary disclaimer.
A mantis shrimp is not a tiny praying mantis living underwater. It is a marine crustacean with a segmented body, unusual stalked eyes, and specially modified front appendages used to capture prey. Some species have a blunt club for striking hard-shelled prey; others have long spiny structures for spearing softer animals. The two hunting designs should not be blended into one invented tool.
The folded front appendage is called a raptorial appendage. When it extends, its appearance helps explain why this animal is different from an ordinary shrimp, even though its rear body has several similar-looking segments. An accurate illustration puts the grasping or club part at the front, not at the tail.
This is a safe indoor paper project, never an experiment with an aquarium animal or a hard object. Do not tap glass, handle a mantis shrimp, or attempt to test its strike. Keep small pieces of card, craft knives, and loose beads away from your dog; draw all details with pencils.
Locate eyes, armored segments, and the folded front claw
Begin with an elongated body divided into overlapping plates. Put the broad head toward the right side of the paper and a small tail fan at the left. Short walking appendages can hang below, but do not make every leg a giant weapon. The raptorial limbs sit near the front of the body.
Give the head two clearly separate eyes mounted on stalks. The eyes should stand out as paired structures that can move, not as little black spots painted on a solid shell. A pale stripe around each eye can make the circular shape legible to children.
Near the front, draw the raptorial appendage as a bent joint with a stout terminal club for a smasher. Its folded position matters: a cartoon club attached directly to the body with no joint misses the mechanism. A close-up can show the thick striking region without claiming an exact microscopic cross-section.
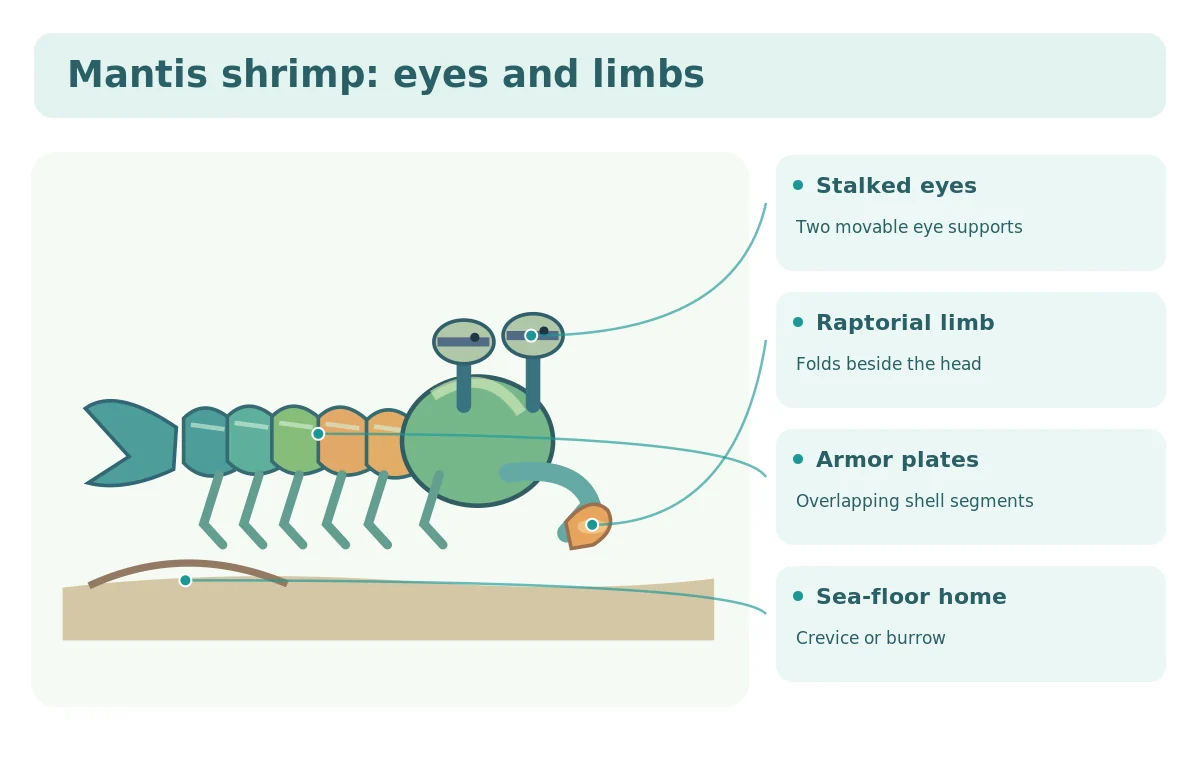
Behind the head, use repeating armor plates and short appendages to establish the crustacean body plan. Show a tapered abdomen and broad rear fan, not a vertebrate fish tail. Put the animal partly beside a rocky crevice or burrow opening in a sea-floor scene.
A small drawn shell can suggest the food a smasher may crack. Do not make the claws strike a child’s hand or a pet. Keep any motion arrow confined to the paper mechanism as an anatomical explanation, not an instruction for using a tool or recreating a forceful impact.
See the difference between smashers and spearers
The left panel is a smasher. Its folded raptorial forelimb ends in a thick rounded club suitable for hitting prey with hard protective shells. Show a snail shell as context, but avoid exploding fragments or sensational force claims.
The right panel is a spearer. Its front appendage carries long, pointed spines arranged for capturing softer prey. Draw the spines as part of the grasping structure rather than a separate spear the shrimp is holding. A simple fish silhouette can be a food context but should not be shown being injured.
Both kinds have stalked eyes and segmented crustacean bodies. It is the front appendage design that changes between panels. If the silhouettes are identical except for the words ‘smash’ and ‘spear,’ redraw the actual appendage shapes.
Australian Museum and the Natural History Museum describe these distinct feeding forms. Do not combine a heavy club with a full set of long spearing barbs and claim it represents a single generic species. A teaching illustration is more accurate when it states which version it depicts.
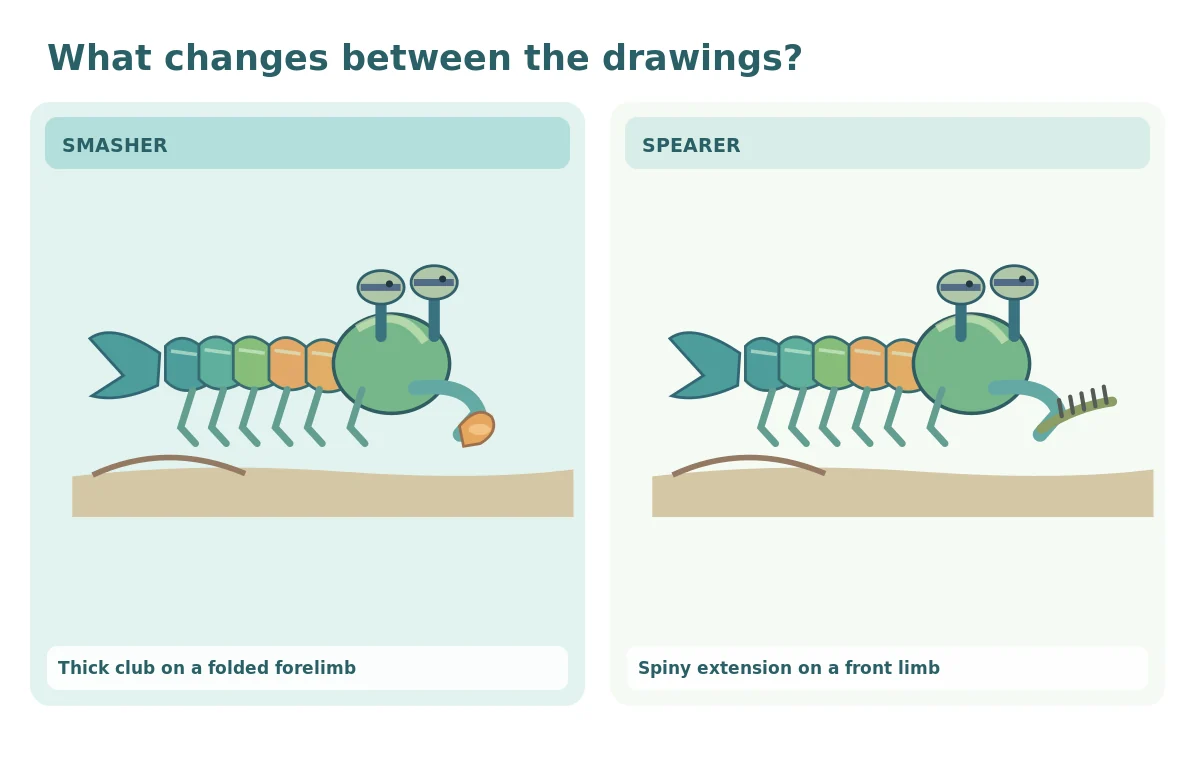
Cover the labels and look at the illustrated bodies or equipment. If the distinction disappears, change the actual shapes or positions instead of adding more words. Each labeled arrow should end on the part it describes.
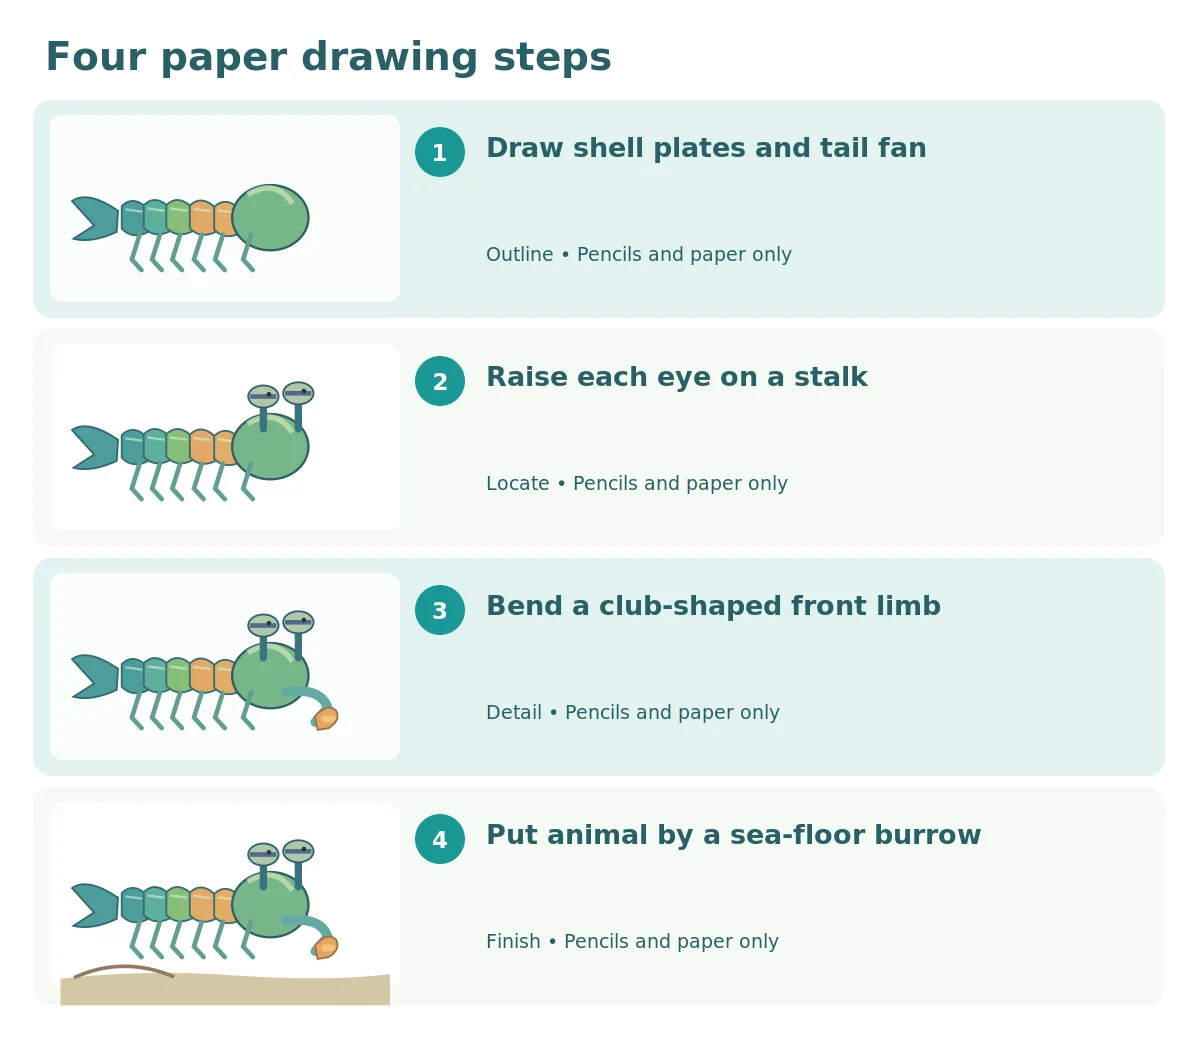
Four safe, paper-only drawing steps
Set a clean sheet on a stable table and work from large silhouettes toward small details. The stages deliberately show different additions; there is no need for live animals, habitat samples, household chemicals, or working models.
Build the segmented marine body
Sketch a tapered, overlapping series of body sections with a head at one end and a small tail fan at the other. Keep the segments distinct by using curved borders rather than a row of identical circles.
Color a few plates in teal, green, or tan. Do not add a fish dorsal fin; this animal is a crustacean living on or in the sea floor.
Raise two stalked eyes
Put an eye on each short stalk emerging from the head. Use an oval or rounded cylinder for the eye surface, with a dark center band if the drawing size allows.
Leave room between the eyes so the stalks remain two separate supports. A single giant cyclops eye erases an important identification feature.
Fold a thick smasher club
Draw a jointed front appendage bent close to the head, then enlarge its thick club-shaped end. Label the limb ‘raptorial appendage’ in an inset and connect the arrow to the actual limb.
Do not portray the club as a handheld hammer or a detached weapon. It is part of the animal’s own exoskeleton and muscle-driven limb system.
Add a burrow and comparison inset
Place the animal beside an illustrated reef crevice or sea-floor burrow opening. In a small second inset, replace the thick club with a long spiny spearer appendage to show the alternative design.
Finish by checking the eye stalks, shell plates, raptorial limbs, and rear fan. Keep the work as a drawing; no aquarium observation or handling is necessary.
Common drawing mistakes and practical fixes
Calling this animal a shrimp with praying-mantis arms but drawing a single smooth tube skips its segmented exoskeleton. Separate the plates and keep the tail fan.
A folded club placed on the rear fan is anatomically wrong. Move the raptorial appendages to the front near the head and show a joint.
Drawing eyes as painted dots on the shell hides their stalks. Raise them clearly above the head so the reader can point to each support.
A spearing claw drawn as a blunt hammer makes the comparison fail. Use different terminal shapes: rounded thick club versus long spiny extension.
Do not add dramatic glass-breaking or finger-injury scenes. Those distract from anatomy and may encourage unsafe imitation. The educational drawing needs only a labeled limb, a prey-context icon, and a habitat line.
Three checks for understanding
Are both eyes supported on visible stalks?
Is the folded raptorial appendage at the front of the body?
Does the smasher club look physically different from the spearer’s spiny limb?
Limits, wildlife respect, and pet safety
Mantis shrimps include many species with different colors and body proportions. This drawing uses a generalized smasher silhouette and a separate spearer comparison; it is not intended as a species key or an exact mechanical diagram.
Do not try to capture or handle marine wildlife. Leave reef habitats and burrows intact. A dog should remain away from loose craft pieces and from marine shoreline wildlife; the safe demonstration is the paper sketch, not a living strike.
How We Research
We compared museum descriptions of the two raptorial limb designs and cross-checked the stalked-eye and segmented-body cues. We deliberately omitted impact-speed numbers and exaggerated color-vision claims, neither of which is needed to draw the core anatomy.
HubPet presents this as a visual learning activity, not a veterinary diagnosis, an instruction to collect wildlife, or a scientific measurement. See About HubPet for the site’s general editorial approach.
Sources
Natural History Museum — Mantis Shrimps. Consulted for the anatomy, feeding or climbing mechanism, and limits described in this paper lesson.
Australian Museum — Mantis Shrimp. Consulted for the anatomy, feeding or climbing mechanism, and limits described in this paper lesson.
Smithsonian Ocean — Smasher Mantis Shrimp. Consulted for the anatomy, feeding or climbing mechanism, and limits described in this paper lesson.
Frequently asked questions
No. Mantis shrimps are marine crustaceans; the name refers to their conspicuous front hunting appendages.
It is a specialized front limb used to capture prey. In different mantis shrimps it may end in a blunt club or a spiny spearer structure.
Smashers use enlarged clubs against hard-shelled prey, while spearers have spiny appendages that capture softer prey.
Mantis shrimps have distinctive movable eyes on stalks, so showing the supports makes their head anatomy easier to recognize.
A paper illustration is enough. Never provoke, handle, or tap on aquarium wildlife to try to trigger a strike.