
This illustrated family STEM activity is not veterinary advice. Read the HubPet vet disclaimer for pet-health concerns. A cardboard waterwheel model illustrates how moving water can exert a force on paddle surfaces and cause a wheel to rotate. It also introduces a practical engineering idea: friction at the axle, support stability, paddle position, and water direction all affect motion. This is a tabletop demonstration with a tiny water flow, not a generator and not a toy for dogs. The project uses adult-prepared, large parts and an enclosed catch tray. Keep dogs outside the room; they might mouth or swallow wet cardboard, tape, and axle parts.
The concept behind this model
TeachEngineering describes classroom waterwheels that convert energy in moving or falling water into wheel motion. A wheel is a rotating body attached to an axle; its paddles receive a push from the stream. The water does not magically turn the wheel simply because it is nearby. For rotation, the stream must strike a paddle with a useful direction of force, and the wheel must be able to rotate without rubbing hard against its support. We do not claim that every cardboard design will turn: material strength, water volume, alignment, and surface friction make classroom results variable.
Materials and a dog-safe setup
Ask an adult to prepare two broad cardboard circles, six to eight folded card paddles of similar size, a wide blunt axle or adult-supplied rounded dowel, two stable support stands, removable tape, a shallow catch tray, a cup of plain room-temperature water, and towels. An adult handles all piercing or cutting well beyond the dog’s reach. End caps or tape should securely cover axle ends so they cannot scrape a hand or become free parts. Water can soften raw cardboard, so protect the paddle surfaces appropriately and treat this as a short demonstration rather than a permanent outdoor machine.
Start with one question
Ask, ‘Will the wheel turn more readily when the water reaches a paddle near the outer edge, or when it splashes directly onto the center?’ Make one change at a time. First test a supported dry wheel by turning it gently with an adult’s finger. Then pour a very small, steady stream from low height onto a paddle face. Do not use pressurized water, water balloons, or tall containers. Count a few turns only if motion is clear and the tray remains stable.
Read the labeled subject diagram
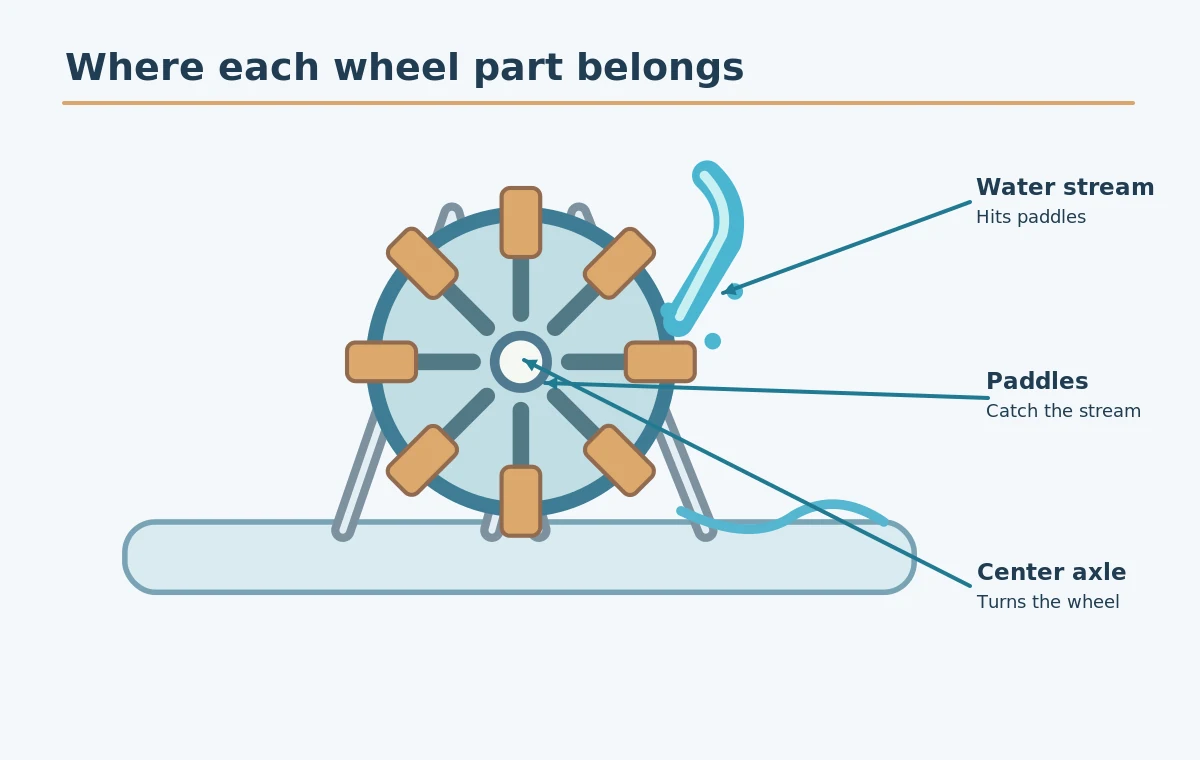
The illustrated wheel has paddle tabs distributed around the rim, a central axle that turns freely between two supports, and a tray positioned underneath. Incoming water touches one side of the circle rather than the center. Labels emphasize the parts that matter during an observation: the water stream, the paddle faces, and the axle. In a real build, supports must be wide and level; the picture is an explanatory layout, not a load-rated engineering plan.
Compare two real arrangements
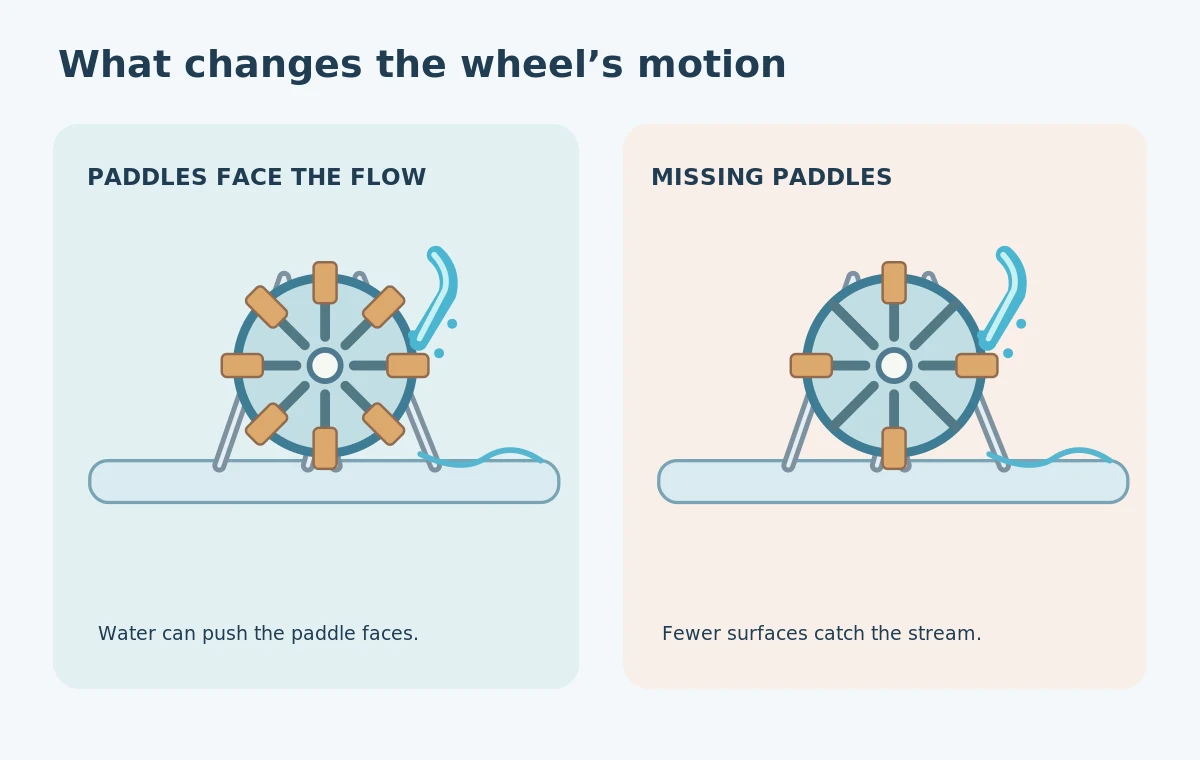
The left model shows several evenly distributed paddles, providing repeated surfaces for a stream to meet as the wheel rotates. The right model has gaps where paddles are missing. With an otherwise identical setup, the second version may catch water less consistently. That comparison is qualitative: it does not guarantee that more paddles always produce faster motion. Too many heavy or badly shaped paddles can add friction or interfere with flow. The lesson is to change one feature and record the result honestly.
Four illustrated steps to try
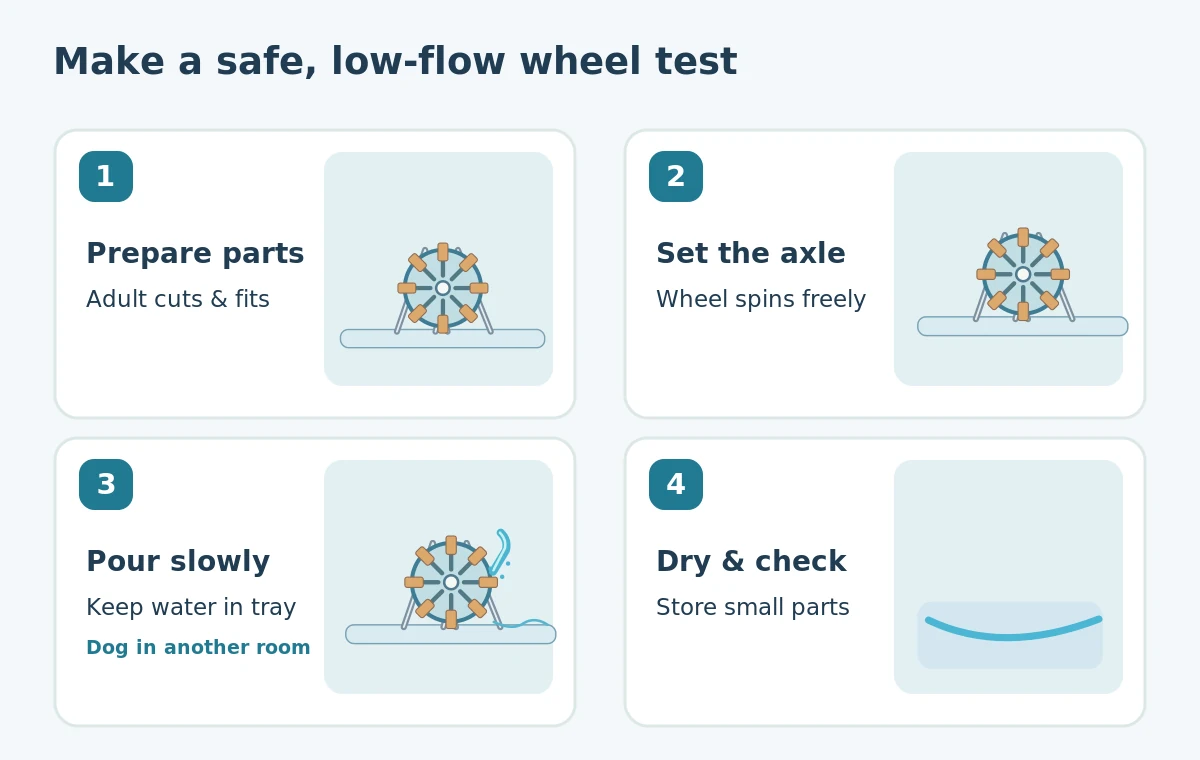
The four illustrations separate assembly, balance, test, and cleanup. Build the model with adult supervision on a protected tabletop. Confirm that the wheel turns freely before introducing water. The child can observe from the side while an adult handles the small pour. When the cardboard softens or starts to shed pieces, stop. Count every part and wet scrap before the dog returns.
Step 1: Prepare matching paddles
An adult makes and secures a matching set of broad folded card paddles to two larger circular side pieces. Keep each paddle aligned so that the stream strikes similar faces around the wheel. Avoid protruding wire, sewing needles, loose paper clips, or sharp brads. Gently tug the finished pieces while the model is dry to check that none can fall away under a small pour.
Step 2: Set a stable free axle
Place the rounded axle into two wide supports so the wheel hangs above the tray without touching its bottom. Turn the wheel by hand; if it catches, adjust the support spacing and level. A good dry test needs only light finger pressure, not a forceful push. Add soft end covers and place the entire assembly inside the perimeter of a shallow catch tray.
Step 3: Introduce a light stream
From a low cup or spouted jug, an adult pours a thin stream of room-temperature plain water onto one paddle face near the wheel’s outer region. Watch whether the wheel starts, stops, or rotates unevenly. Do not keep adding water to force a result. Stop to empty the tray long before it reaches its rim and keep the floor dry at all times.
Step 4: Stop, dry, and check
Move the model onto a towel, empty the tray, and count each axle cover, paddle, and support. Replace soggy cardboard rather than letting it shed fragments. Secure dry reusable parts in a closed box, and discard softened scraps in lidded trash. Dry the work surface and floor before the dog comes back into the room.
What to observe and write down
Choose one mark on the wheel rim and count how many times it passes the top while the small stream flows. Record whether the axle spun freely in the dry test and whether the first water trial moved the wheel. If you repeat the test, use roughly the same pour height and amount, and note any soaked or bent paddles. A quick sketch of the wheel with the pour location marked is usually more useful than claiming an exact efficiency figure. A wheel that never turns can still teach about friction and stream placement.
Troubleshooting and important limits
If the wheel rubs the stand, widen or straighten the supports. When the stream bounces off without movement, try a different paddle angle with the equipment dry. If water soaks into the structure, stop and replace the affected pieces rather than adding stronger flow. A splash tray catches most water but cannot eliminate every drip; protect the work area. A classroom wheel made from card and tape is not an electrical generator, and no pet should drink from the used activity tray.
A useful extension
Draw the wheel in two states: water landing on the center and water landing farther from the center on a paddle. Ask which arrangement produces visible rotation. Older children can record a short sequence of turns for two paddle layouts, keeping the stream as similar as possible. Use observations such as ‘moved’, ‘stalled’, or ‘turned twice’ rather than estimating power output from a fragile model. Discuss how full-size waterwheels need strong supports and suitable water flow to do useful work.
Keep the learning activity safe around dogs
Keep all assembly tools, cut cardboard, tape, and axle caps away from pets. ASPCA warns that dogs may swallow craft supplies and suffer gastrointestinal blockage even when they are not strongly toxic. The tray also poses a spill hazard, so an adult must wipe and check the floor before letting a dog enter. Never use hot water, mains electricity, powered motors, chemical additives, or pressure hoses. Adults, not dogs, control the stream and handle any cutting. If a part goes missing and a dog may have swallowed it, call a veterinarian.
How We Research
We reviewed University of Colorado Boulder’s TeachEngineering waterwheel activities for the relationship between paddles, axle rotation, and a moving water stream. We also consulted ASPCA school-supply safety advice to design a separation-first pet boundary. This illustrated home-scale version is an educational adaptation; we did not test a particular commercial kit or measure its generated power. For editorial methods, see How HubPet researches topics.
Sources
TeachEngineering — Water Power. Educational or pet-safety reference used in this activity.
TeachEngineering — Waterwheel Work. Educational or pet-safety reference used in this activity.
ASPCA — Back-to-School Pet Safety. Educational or pet-safety reference used in this activity.
Safety reminder: this is a supervised human learning activity, not pet enrichment or veterinary guidance. If a dog may have swallowed craft supplies, call your veterinarian or an animal poison control service for advice.
Water pushes against paddles at a distance from the axle. If that push overcomes resistance at the supports and axle, the wheel can rotate.
For this demonstration, direct a small stream onto a paddle near the wheel’s outer area. A stream on the center often provides little turning effect.
Not always. Paddle shape, weight, friction, water direction, and support alignment also affect the result. Treat paddle number as one variable.
Avoid exposed sharp fasteners and detachable tiny hardware. An adult should prepare secure joints and covered axle ends before the child observes the wheel.
No. Use a closed door or reliable room separation, then dry the floor and remove every small part before allowing your dog back.