
Dog nail clipper blade care is not a decorative maintenance task. A blunt, chipped, or misaligned jaw can squeeze or split a claw instead of cutting its visible tip cleanly. Humane World for Animals warns that dull blades can hurt an animal, and VCA stresses low-stress nail handling. Before a grooming session, inspect the tool while it is empty and away from your dog. This guide explains what a working cutting edge should look like, how to remove debris without touching the sharp surface, and when replacement is the safer choice. It is about tool readiness, not permission to clip an uncertain nail.

Inspect the empty jaws under good light
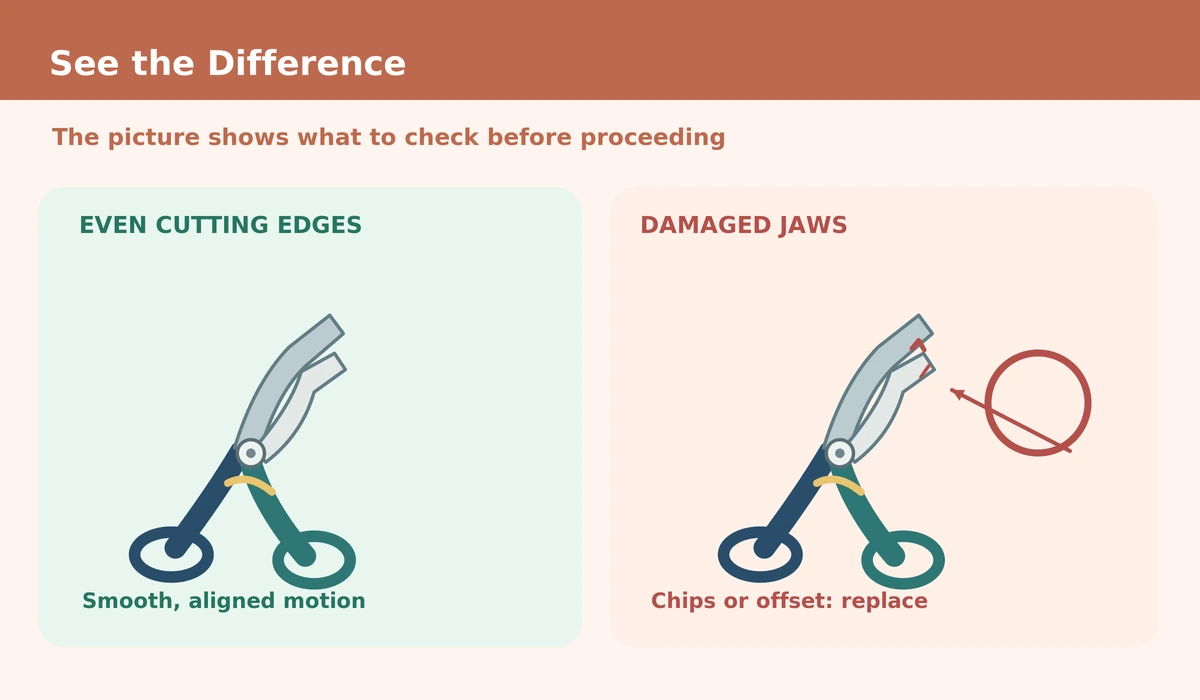
Open the clipper away from the animal and look for chips, rust, a bent cutting edge, or a gap where the blades should meet. Squeeze the handle gently without a nail between the jaws. The motion should feel smooth and predictable, not gritty or crooked. Do not test sharpness on your fingertip or cut a pet nail just to see whether a tool works. If the blades do not line up or the hinge binds, set the clipper aside. A damaged edge is not improved by applying more pressure to a dog’s paw.
Recognize signs of a dull cutting edge
A healthy clipper should cut an appropriate nail tip without crushing it. Warning signs include repeated squeezing, twisted cuts, crushed edges, or a claw that frays rather than separates cleanly. The cause could be a worn blade, poor alignment, or a tool the wrong size for that nail. Stop the session instead of trying harder. Humane World notes that a dull blade can split or hurt a nail. A calmer dog will not make a damaged tool sharp again; the tool itself needs attention.
Match jaw opening to the nail
A large, heavy clipper may block the view of a tiny puppy nail, while a small clipper can struggle with a thick adult claw. The cutting opening should let you see the intended tip and keep nearby skin outside the jaws. Compare the tool’s rated use to your dog’s nails, but do not assume advertised breed ranges guarantee a safe fit. Check the hinge, spring, and handle grip before approaching the paw. If your hands cannot operate the tool steadily, choose a more controllable design or ask a groomer for advice.
Clean visible nail debris after a session
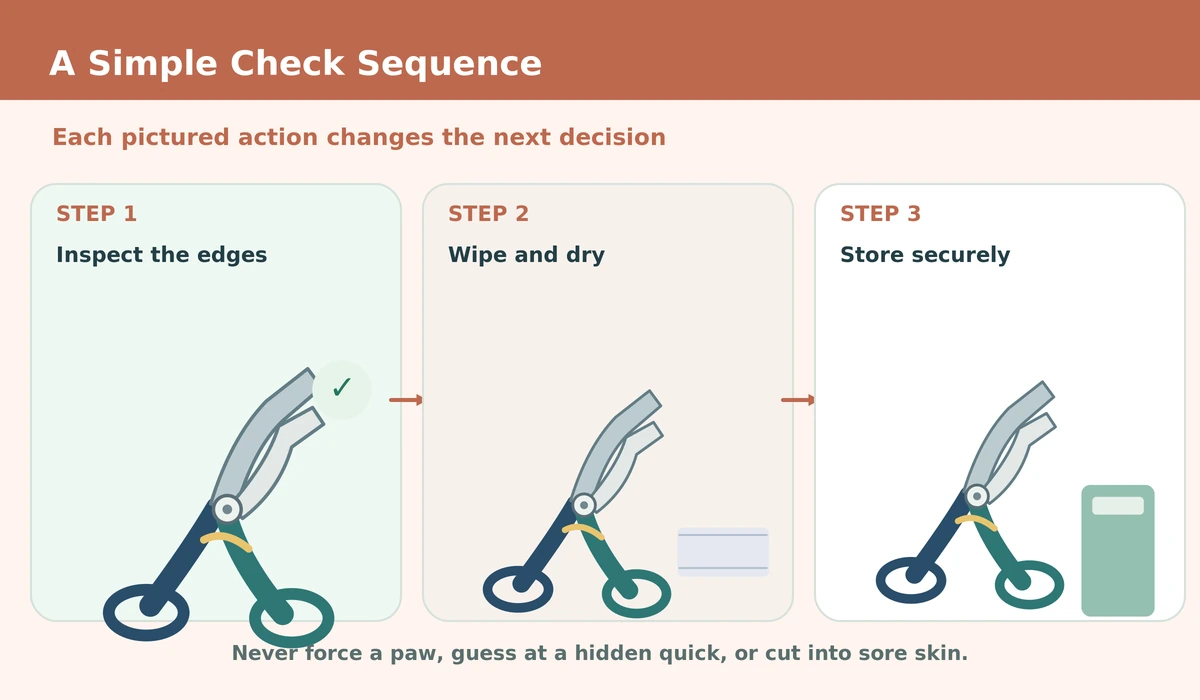
Hair, dust, and claw fragments can collect around the jaws or hinge. Remove loose material carefully with a soft cloth or brush while the clipper is closed and kept away from pets and children. Follow the manufacturer’s cleaning instructions for the specific material and mechanism. Do not immerse an electric component or use a harsh chemical unless the manufacturer explicitly permits it. Dry the tool before storage. Cleaning is about keeping moving parts predictable; it does not sterilize a product or make a chipped edge safe.
Keep moisture away from the hinge
Wet storage encourages corrosion on some metal components. After using an approved cleaner, wipe away moisture and let the clipper dry fully. Look at the pivot area for grit, rust, or a spring that no longer returns the blades reliably. Do not lubricate a clipper with an arbitrary oil that might contact a pet’s skin or nail; follow product directions. If the hinge remains sticky or stiff despite normal cleaning, replace the tool or have it serviced as instructed. Unreliable motion can produce a sudden oversized cut.
Store closed, protected, and out of reach
Use the original protective cover or a closed drawer where children and pets cannot reach sharp edges. Avoid tossing clippers into a bag of damp towels or heavy metal grooming tools. A loose tool can damage its edge, open unexpectedly, or attract a curious animal. Keep pet styptic supplies and veterinary contact information in the grooming area, but store those separately according to their labels. A quick check before each use is better than discovering a damaged jaw when your dog is already holding a paw up.
Decide when not to sharpen at home
Some clippers have replaceable blades, while others are intended to be replaced as a unit. Do not grind, file, or bend a cutting edge unless the manufacturer provides a specific safe maintenance procedure. An unevenly sharpened jaw can put unexpected pressure on the nail. If replacement blades exist, use compatible manufacturer parts and follow directions; never mix similar-looking hardware from another model. When uncertain, an inexpensive replacement clipper is safer than improvising a sharp-edge repair near a dog’s sensitive quick.
Test the handle and locking mechanism
With the tool empty and the pet elsewhere, open and close it several times. A spring that jumps out, a lock that slips, or a grip that rotates in your hand can interrupt a precise cut. Check the rubber handles for looseness and cracks. The safest tool is one you can position calmly with an unobstructed view of the tip. If your hand tires or the blade motion is unpredictable, take a break and change equipment. Equipment maintenance includes knowing when your grip and attention are no longer reliable.
Never use tool maintenance to skip nail checks
Even a brand-new sharp clipper can injure the quick if placed too high on the nail. Before cutting, look for the sensitive core on pale nails and be especially conservative with dark ones. Support the toe in a natural position on a nonslip surface. If the dog moves away, stop. Also look for a split claw, abnormal growth, swelling, or pain, because these issues may need a veterinarian. Blade care reduces one avoidable source of crushing, but it cannot diagnose the foot or substitute for controlled handling.
Use a five-point pre-session checklist
Before each session, confirm the edge is clean, aligned, dry, and free of visible damage. Then make sure the handle opens and closes smoothly, and that your dog can stand or rest comfortably. If any check fails, do not cut. When a clipper starts producing rough cuts or you lose confidence in its alignment, replace it rather than keeping it for another season. Record the change if several family members share grooming duties. A reliable tool supports a short, kind session; it never requires finishing every nail today.
How We Research
HubPet reviewed veterinary and animal-welfare guidance relevant to dog nail clipper blade care, compared what sources support, and separated everyday observation from problems needing hands-on care. We accessed the resources below on November 1, 2026. We do not diagnose wounds or recommend forceful grooming. For more about the editorial process, see About HubPet.
Sources
Humane World for Animals — Trimming Your Cat’s Claws. The complete reference explains its recommended handling or nail-care method and limitations.
VCA Animal Hospitals — Handling Exercises for Nail Trimming. The complete reference explains its recommended handling or nail-care method and limitations.
VCA Animal Hospitals — How to Trim a Dog’s Nails. The complete reference explains its recommended handling or nail-care method and limitations.
This is general pet-care education, not veterinary diagnosis or treatment. A painful nail, persistent bleeding, swelling, a claw in the pad, or major walking changes need a veterinarian. Read the veterinary disclaimer.
Repeated squeezing, crushed or frayed nail tips, and uneven cuts are reasons to inspect or replace it.
Only if the manufacturer specifies a safe method. Otherwise replace the blade or clipper.
Follow the specific manufacturer instructions; soaking may harm some tools or leave unsafe residue.
Stop using it, clean only as directed, and replace or service it if movement remains unpredictable.
No. Sharpness improves the cut, but correct placement and a safe margin are still essential.