
A wire or plastic dog crate can scratch a finished floor even when it appears perfectly still. The risk is usually at the small contact points: hard plastic feet, exposed metal edges, shifting legs, and moisture trapped below a mat. The goal is not to wrap the crate in thick fabric. It is to create a steady, cleanable support with enough grip for a dog to enter calmly. Examine both the crate and the floor before choosing any protective pad.
Map the actual contact points
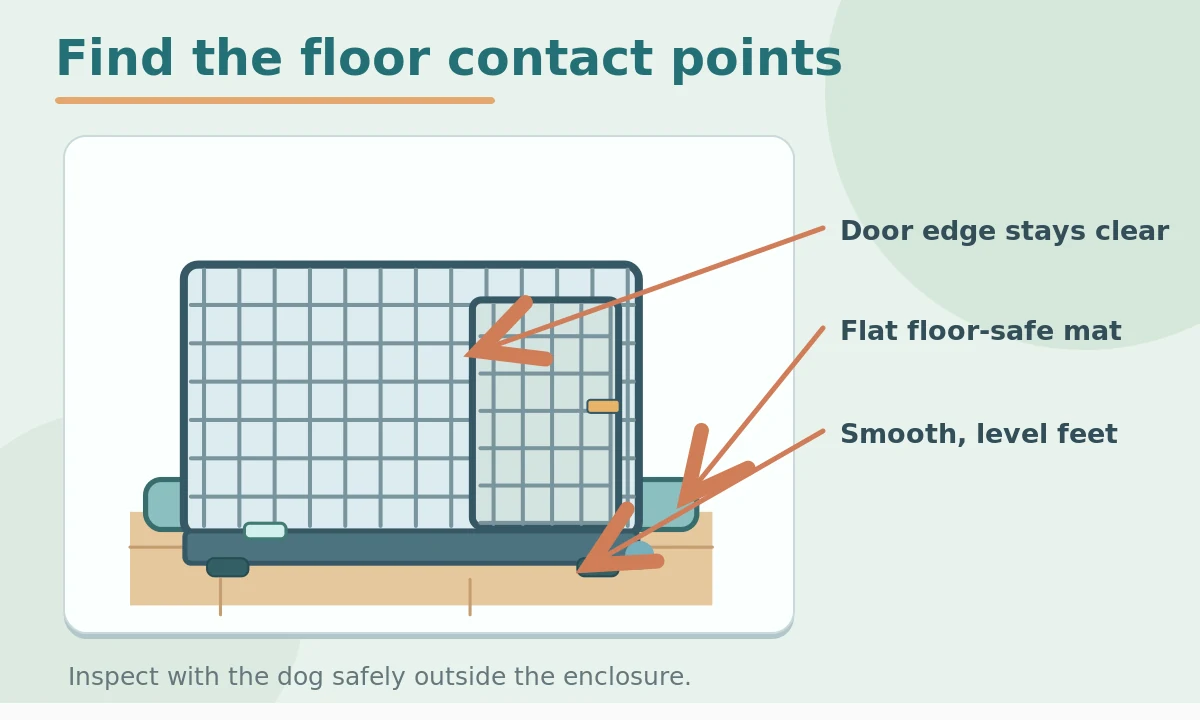
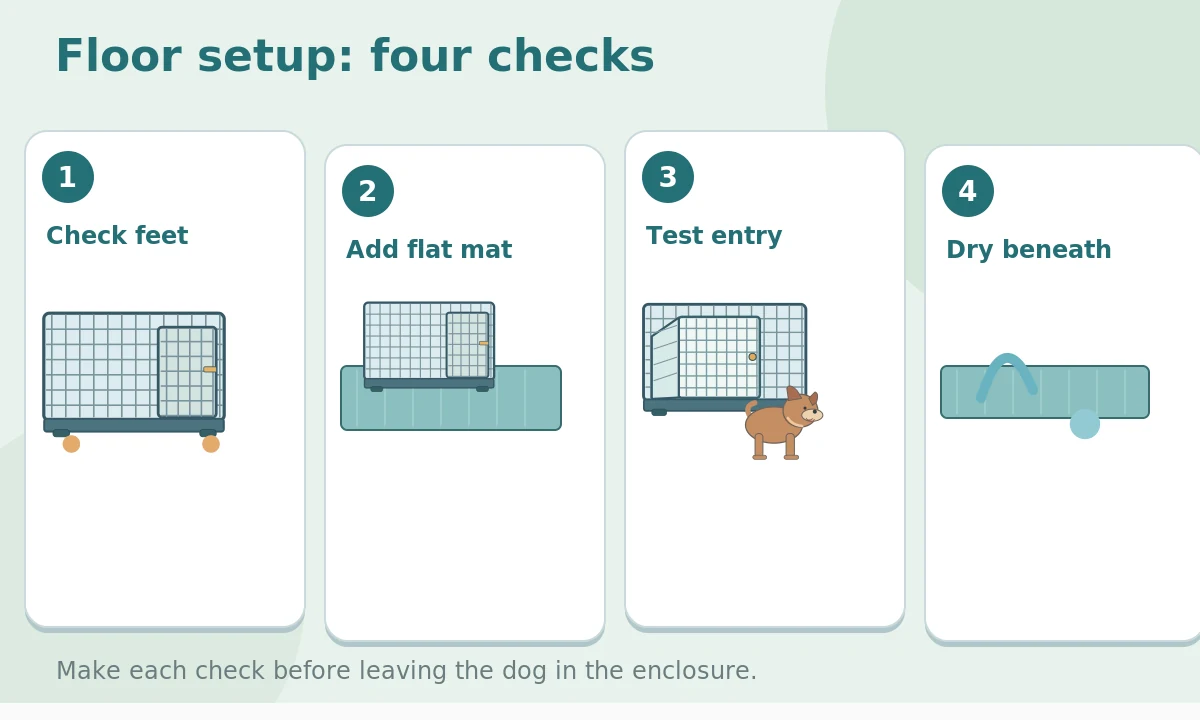
Remove the crate from the spot and look underneath in good light. Some wire crates rest on four corners, others have long runners, and molded plastic carriers may use shallow feet. Slide a piece of paper under each contact area to see where weight lands. Check for missing rubber caps, rough welding, a bent leg, or a loose tray that shifts as the dog steps inside. Place the empty crate gently back down and press the top corners with both hands. If it rocks, adjust the setup before a dog uses it. A pad cannot make a structurally bent crate safe.
Choose floor-friendly grip without sticky backing
Select a flat, washable, nonslip barrier rated for the surface under it. Some rubber or vinyl backings can discolor certain hardwood finishes, especially when warm or damp. Check the flooring manufacturer’s care instructions and test a sample in a low-visibility spot first. A thin protective mat that extends beyond all the crate feet can work better than small pads that slide independently. Avoid stacking several soft rugs; the crate may wobble as a puppy changes weight. If it already rocks without a mat, repair or replace the damaged support instead of hiding the issue.
Keep the entry edge level and clear
The mat should not curl into a trip point at the crate door. If the door opens outward, allow its full arc to clear the pad without catching the corner. A dog can hesitate or scrape its paws if the threshold or tray rises unexpectedly. Check that the door can latch freely and that protective material never gets wrapped through the door hardware. Stand to the side of the entrance and watch the dog step in voluntarily. If the crate slides, pause the practice and increase floor grip rather than pushing the dog forward.
Look beneath the crate after every spill
A tipped water bowl, wet paw prints, or a cleaning spray can leave liquid trapped where you cannot see it. Lift the empty crate and protective mat regularly, dry the floor completely, and inspect the finish for cloudy patches or swelling. Do not use a dripping mop under the unit. Clean a soiled tray separately, let it dry, and put it back only when no moisture remains. For an accident-prone puppy, choose a removable waterproof floor barrier that is simple to wash instead of absorbent padding that may stay wet for hours.
Distinguish protection from padding inside the crate
A protective sheet beneath the crate does not replace a comfortable interior resting surface. Inside, bedding must fit flat without bunching against the latch or blocking access. Some puppies shred blankets or swallow foam pieces, so choose interior materials based on observed behavior and veterinarian advice. The dog should still stand, turn, and stretch. Never compensate for a crate that is too small by putting a fluffy cushion under its outer base. Outside protection and inside comfort solve different problems and should be evaluated separately.
Compare four common under-crate solutions
Individual adhesive furniture pads can be inexpensive but may peel, shift, or miss a runner-shaped support. A one-piece non-slip mat provides a larger footprint and easier cleaning, provided the backing suits your finish. A rigid floor protector can spread weight well, although a slick top may allow the crate to slide. Thick carpet scraps may trap dampness and make stability harder to assess. Choose according to the crate’s actual feet, the flooring material, the dog’s activity, and the ease of lifting everything for cleaning.
Practice a calm entry before leaving the room
Leave the crate door secured open during first introductions. Reward the dog for approaching and investigating without rushing the process. Observe the pad when the dog steps forward or turns around. There should be no shifting, scraping sound, or newly curled edge. If the dog resists the crate, changing the mat alone will not solve fear. Continue brief, voluntary practice and consider a safe gated area if confinement causes panic. The crate must never be used to punish or to force an anxious dog to remain inside.
Build a five-minute maintenance check
Once a week, run a finger along each exterior foot and corner to detect roughness without placing your hand in a sharp gap. Look for wet rings, trapped hair, dirt ridges, and uneven wear below the mat. Lift the crate only when empty and use help if its weight or shape makes handling awkward. Clean with products approved for your floor and allow ventilation before resetting the unit. Keep the entry route free of shoes, cables, and folded rug corners. A stable setup makes routine care simpler.

Know when the floor is not the main problem
Frantic pawing, repeated escape attempts, drooling, or distress when the door closes call for a different plan, not stronger tape beneath the crate. A stressed dog can injure paws or teeth on hardware. Speak with your veterinarian or a qualified reward-based behavior professional about alternatives. Likewise, sudden reluctance to step over a low threshold can reflect pain or mobility changes. Stop pressuring the dog and arrange a veterinary check. An attractive floor protector is never a substitute for a suitable confinement plan.
Keep the layout adaptable as your dog grows
Recheck floor clearance when you move the crate, add a divider, or change to a larger model. The feet and door swing may land in different places even if the outer dimensions seem similar. Look for fresh floor scuffs after the first several uses and adjust the barrier before damage spreads. A mat that works in a shaded living room may behave differently beside a sunny window or heater. Maintaining dryness, firm contact, clear access, and your dog’s comfort matters more than buying a special branded pad.
How We Research
We compared current dog-crate and playpen guidance from veterinary teams and animal welfare organizations, then translated the handling and environment principles into practical home-equipment checks. The diagrams illustrate decision points, not manufacturer-approved assembly instructions or crash testing. Follow your own product manual, and stop if the dog appears distressed. Read our about page and veterinary disclaimer. Seek veterinary advice for injuries, pain, sudden mobility changes, or severe confinement distress.
Sources
Cornell University College of Veterinary Medicine: Dog Crates — reference guidance on humane crate or pen use, stable setup, and pet comfort.
RSPCA: How to Crate Train a Puppy — reference guidance on humane crate or pen use, stable setup, and pet comfort.
VCA Animal Hospitals: How to Crate Train Your Dog — reference guidance on humane crate or pen use, stable setup, and pet comfort.
Yes if every contact point is smooth, the crate is stable, and you protect the finish as the floor maker recommends. Check frequently for sliding and trapped moisture.
Some rubber or vinyl materials may react with finishes. Confirm compatibility with the flooring manufacturer and test the backing before leaving it in place.
It should cover every foot and support point while staying flat and outside door hinges. Leave the threshold clear of curled or loose material.
Remove the padding and inspect the frame, feet, and floor. Repair or replace a defective support instead of stacking more soft layers.
Check after spills or accidents immediately, and lift the empty unit on a regular schedule to remove debris and let the surface dry.