
This guide provides general pet travel and product information, not veterinary or airline approval advice. Contact the operating airline for current rules. If a pet is ill, in pain, or struggling to breathe, consult a veterinarian. See our veterinary disclaimer.
Airline pet carrier zippers and mesh can determine whether a bag feels secure when a pet shifts, scratches, or leans on its side. The most expensive carrier can still have a hard-to-see gap where two zipper pulls meet. The cheapest one is not automatically weak, either: inspect construction and fit directly. Focus on the full closure path, stitching, ventilation placement, and whether you can operate an entrance without trapping fur. This article explains what to test at home before travel. It does not claim that a particular clasp or mesh pattern guarantees a pet cannot escape.
Map every opening before using the carrier
Set the carrier on a table with no animal inside and count the actual access points. Front doors, top openings, expanding compartments, and removable panels may each have a separate zipper. Trace the entire edge of each entrance with a finger to locate corners where the slider changes direction. Check that the door closes fully without catching folded material in its path. If two sliders meet, examine the small gap between them. A normal seam can look like an opening in photos, so inspect the physical construction, not just a promotional close-up.
Test zipper movement and pull-tab position
Run each zipper slowly several times. It should close without excessive force, loose teeth, or a persistent snag at the corner. Look for fabric that could catch an ear, tail, or long coat. Some carriers have loops that secure zipper pulls together according to the maker’s instructions. Those loops are not a reason to attach sharp hooks, loose chain, or heavy padlocks. Choose hardware that is secure and practical to operate in an emergency. If a slider separates after closing, stop using that opening until a proper repair restores it.
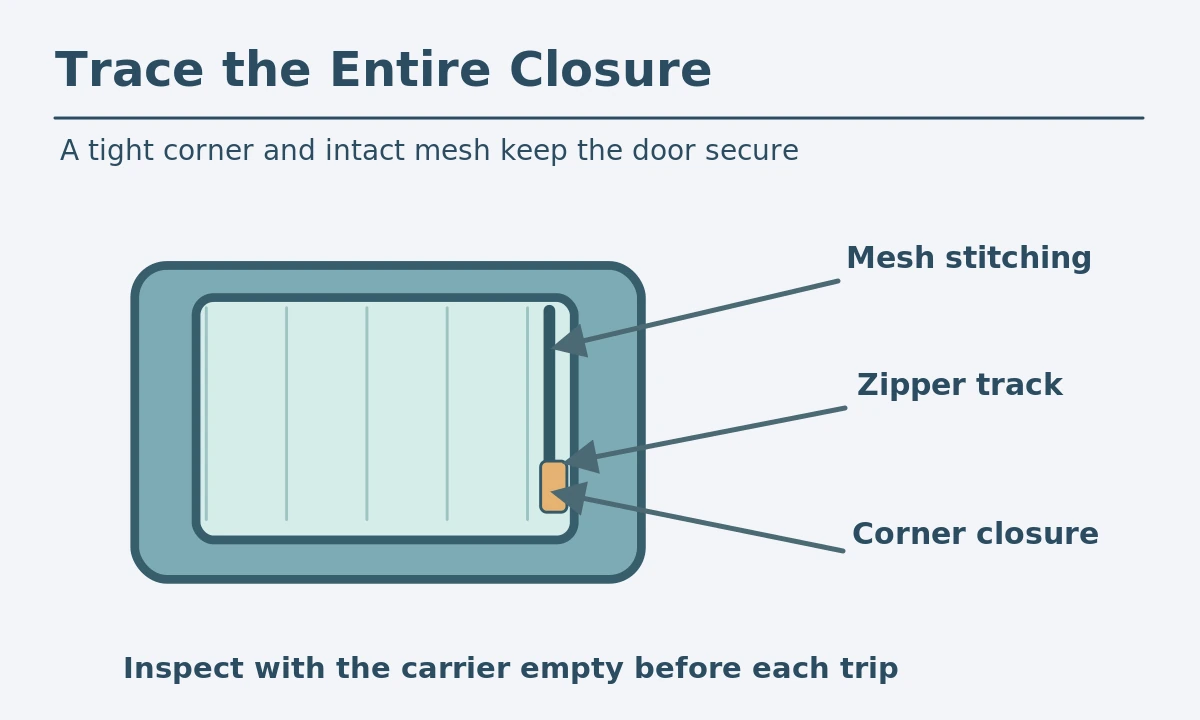
Look closely at mesh attachment points
Inspect whether the maker stitched mesh firmly along the entire window perimeter, particularly at corners and where a zipper runs beside it. Gently feel for exposed sharp wire, loose fibers, and threads that can catch claws. A pet that repeatedly scratches or bites at mesh may damage it much faster than ordinary handling would. Reinforcement should not create stiff edges inside the space where the animal turns. Check for holes after every practice session. Replace a torn panel rather than covering a gap with tape that a pet might chew off.
Check ventilation in realistic positions
Mesh window count is not a reliable ventilation score by itself. Consider which openings remain clear when the carrier rests on the ground, next to a person, and in the stowed orientation required by an airline. Do not block every window with clothes, luggage, or a decorative wrap. Good visibility into the carrier helps you check posture and breathing without unzipping it. A very anxious animal might appreciate limited visual shielding where it does not obstruct airflow, but confirm the airline’s rules and monitor temperature and distress signs.
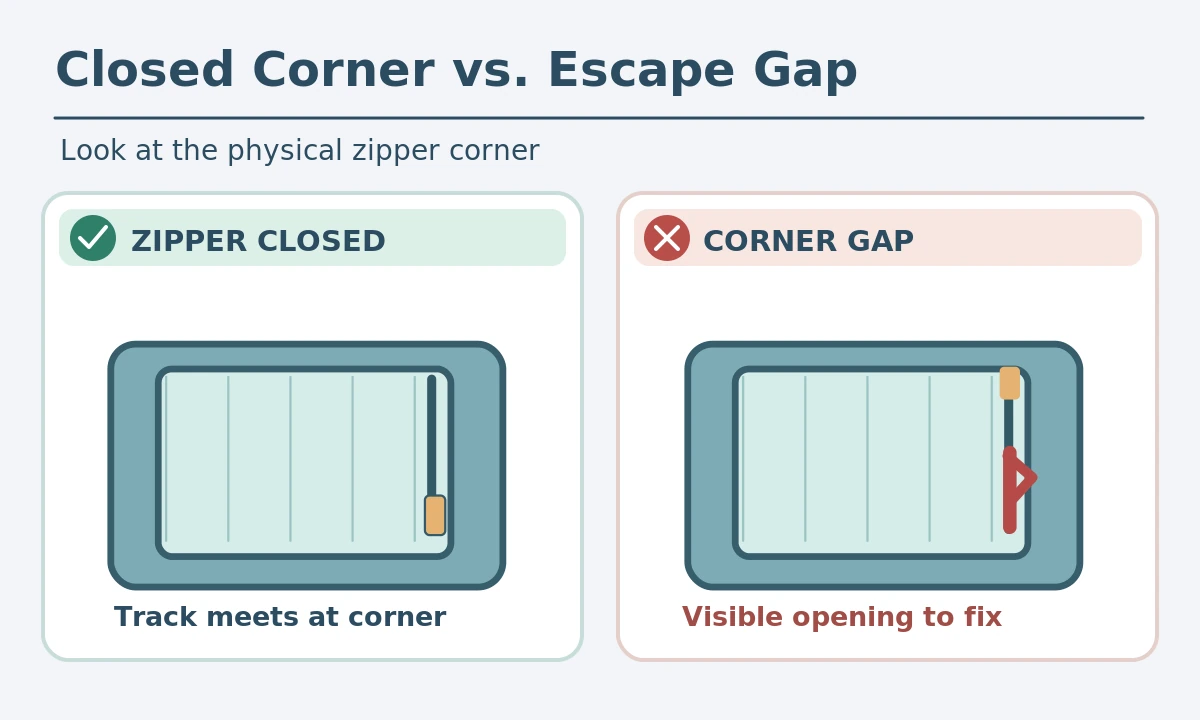
Compare a fully closed door with a corner gap
A useful side-by-side inspection shows a continuous zip track meeting at the corner versus a separated section large enough for a paw or nose. The difference is physical, not a general green-versus-red sticker. Pull gently on the closed door edge while the carrier is empty: there should be no sudden opening or torn stitch line. Never test escape resistance by provoking or pulling on an animal. Small pets can squeeze through gaps that appear minor. A gap near the hinge, zipper stop, or mesh seam needs repair or replacement.
Consider where a pet will place its paws
When a dog or cat stands and turns, paws can land against the front entrance and mesh sidewalls. Locate any hard plastic zipper stop or rough binding that touches the foot. The floor board should support the animal so it is not constantly bracing its feet against a mesh panel. Watch a calm voluntary trial at home and see whether an animal naturally pushes one corner. If pressure concentrates on a narrow seam, the design may not be a good match. An escape-resistant claim cannot compensate for undersized interior space.
Avoid improvised restraints and attachments
Products may come with interior tethers, tie-down straps, or clip-on tags. Read the maker’s directions for these parts and avoid any arrangement that can wrap around a neck or entangle a limb while the animal is inside. Do not attach loose carabiners to a zipper simply because they look rugged. An animal should not wear an accessory that becomes trapped in mesh. Identity tags and microchip records can help after an unexpected escape, but prevention relies on a properly sized, fully secured carrier and careful handling.
Practice opening and re-closing in a calm room
Before travel, choose a secure room with closed doors and windows. Open a carrier entrance slowly and reward the animal for waiting nearby; practice re-closing the door without catching fur. If the pet has not learned to enter voluntarily, work on carrier familiarity instead of repeatedly pushing the animal through a narrow opening. Build calm, short sessions rather than one stressful rehearsal. For a highly fearful pet, a veterinarian or qualified reward-based behavior professional can help make a plan. The AVMA advises getting animals accustomed to their carriers before trips.
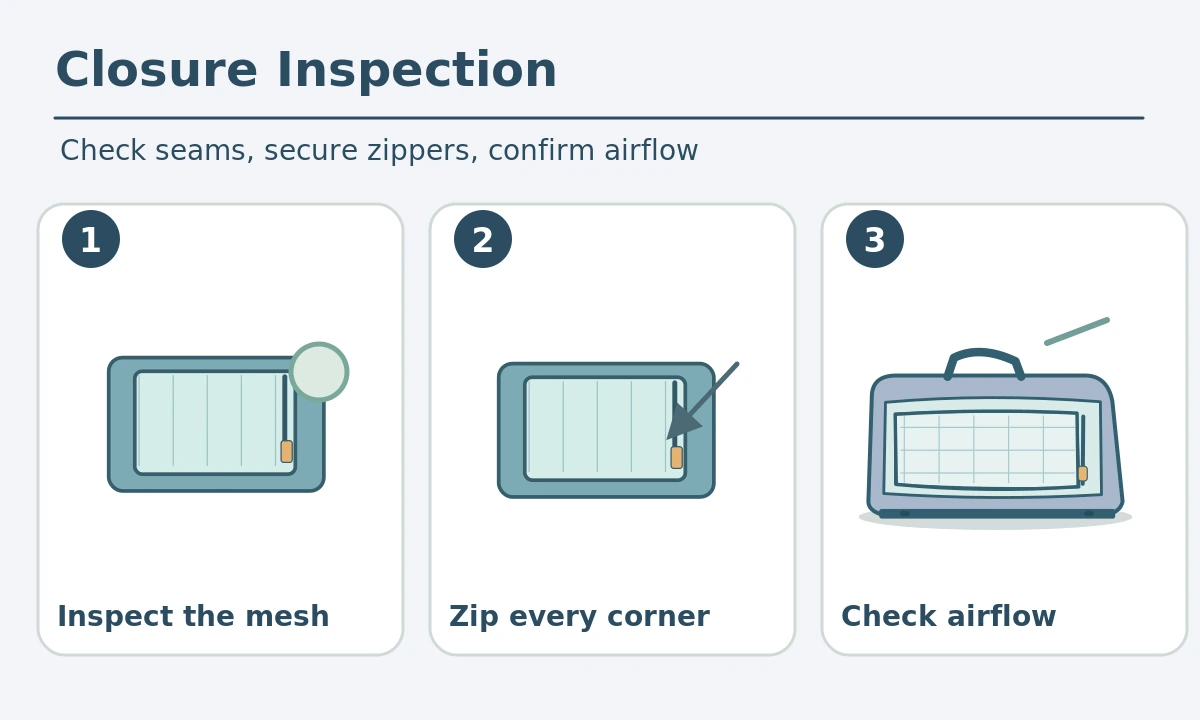
Use a final security checklist at departure
Inspect the empty carrier for holes, broken zipper teeth, frayed mesh, and shifting base panels. After your pet enters, run every door shut carefully and visually confirm that each pull reaches its stop. Ensure no folded accessory covers ventilation panels. At airport security, follow current screening instructions and use careful containment so the animal cannot bolt. On board, follow all crew instructions for stowage. Stop using a carrier if you discover a damaged door or a mesh hole, even when it worked well last month.
How We Research
We compared the FAA rules for in-cabin pet containers with travel and carrier-familiarity guidance from the American Veterinary Medical Association. Where relevant, we reviewed USDA APHIS information about air travel equipment and the travel-security preparation notes identified in Sources. We then translated these requirements into dimensions, physical parts, inspection steps, and practical limits for the particular carrier topic. Product-specific construction, measurements, approved seating, and destination paperwork require current manufacturer and airline confirmation. No carrier was laboratory tested or certified by HubPet. Learn about our approach at About HubPet.
Sources
AVMA, Traveling with Your Dog or Cat. Read the guidance.
USDA APHIS, Preparing Pets for Air Travel. Read the guidance.
FAA, Cabin Safety: Pets FAQ. Read the guidance.
Safety note: Never place a live animal on a security X-ray conveyor or leave a pet in a closed carrier exposed to heat. Keep ventilation clear and closure hardware intact. Contact your veterinarian before air travel if breathing issues, medical conditions, or severe distress are concerns; never use sedatives without veterinary advice. Airline size and handling requirements can change.
No. What matters is whether the track closes completely and the pulls meet without a gap. Follow the design’s intended closure method.
No. Tape may detach or be chewed and does not restore the sewn panel’s strength. Repair correctly or replace the damaged carrier.
Not always. Their placement, surrounding obstructions, material quality, heat, and how the carrier is stowed all affect practical airflow.
Do not improvise heavy, sharp, or dangling hardware. Use only the manufacturer’s intended closure system and check emergency access.
Inspect before every trip and after rough handling, chewing, or scratching. Pay special attention to seams and zipper corners.