
Baseboards can make a doorway narrower at the bottom than it is near the latch. That small difference matters when a pet gate uses four contact points or brackets on an uneven wall. A frame that looks straight from the hallway may twist once the lower feet meet raised trim. This guide explains how to map those surfaces, check manufacturer-approved offset mounts, and avoid dangerous gaps. It does not provide a one-size-fits-all drilling plan, because safe fasteners and support locations vary with the wall and gate model. For injury or pet health concerns, speak with a veterinarian; see our veterinary disclaimer.
Sketch the doorway before buying
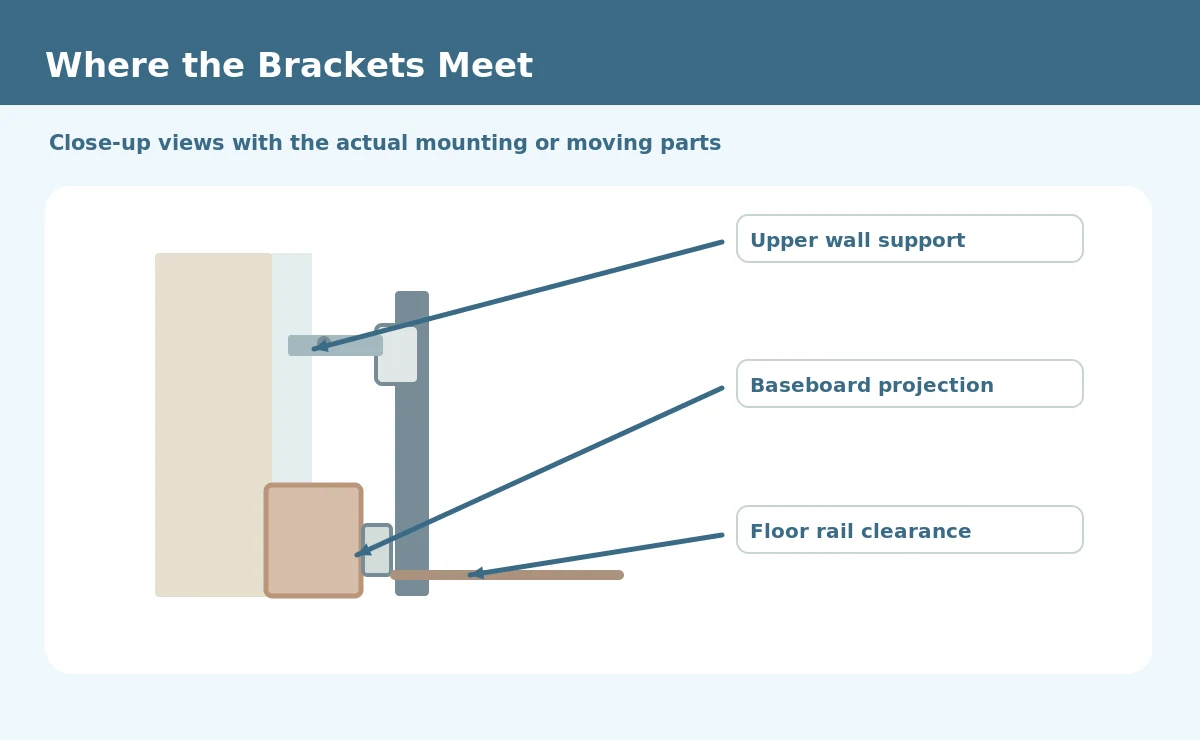
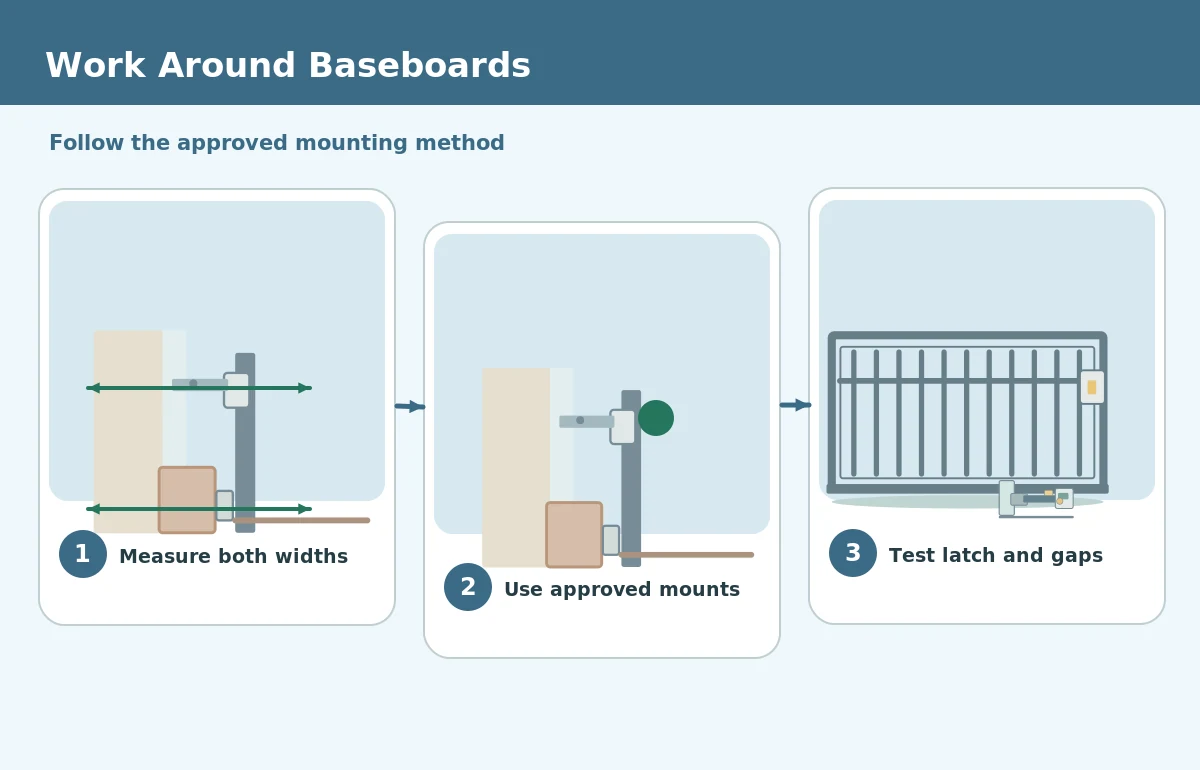
Stand in the opening and identify the lower baseboards, any quarter-round trim, doorstop molding, wall corners, and the flat wall above them. Measure the distance between contact surfaces at the gate’s intended upper and lower mounting positions. Note whether a door needs to open fully and where people will step. Record both width and the amount of projection from the main wall. Baseboards often make the lower gate supports sit closer together than the upper ones; understanding that difference is more useful than using a single doorway number.
Check where the mounting feet actually touch
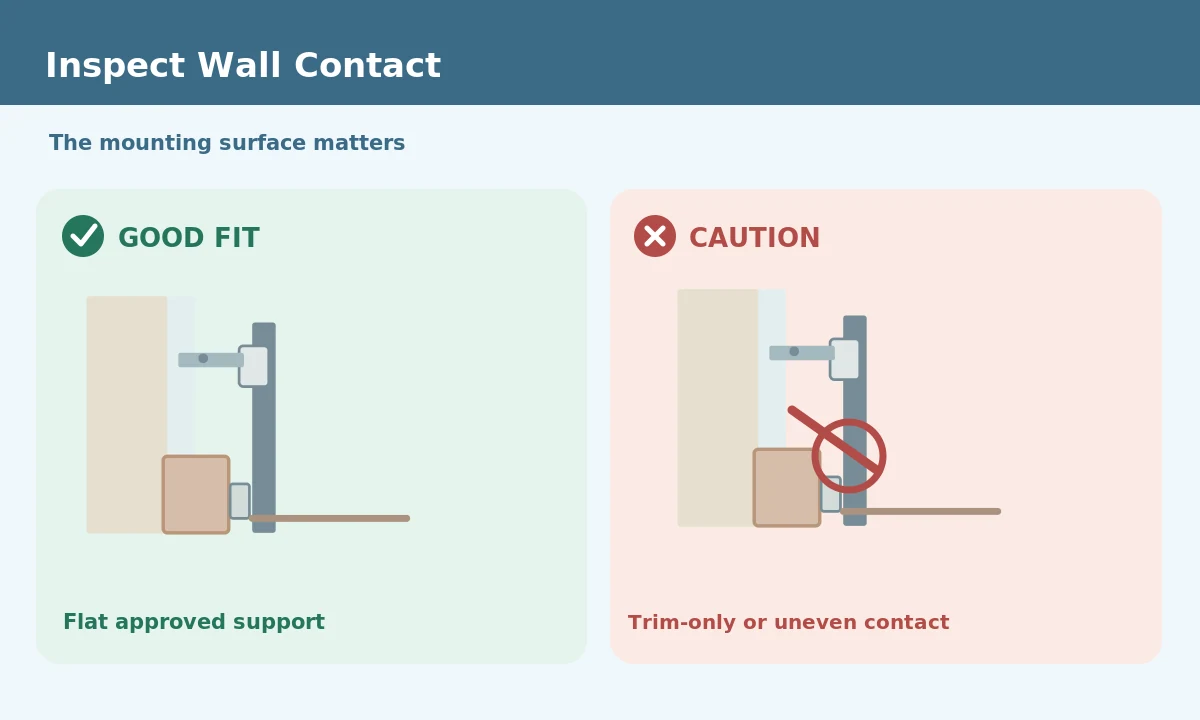
A pressure-mounted design normally transfers force through its specified contact pads or wall cups. Each contact must meet a firm surface according to the instructions. If one lower cup presses against a rounded trim edge while the upper cup rests on flat drywall, the gate may look vertical yet lack adequate support. Never prop a cup on a narrow decorative lip or use an adhesive furniture pad as an unapproved load-bearing repair. The gate maker may provide a trim-specific kit or may require a different mounting surface altogether.
Understand approved offset spacers
Some hardware-mounted gates have manufacturer-supplied wall spacers designed to bring an upper bracket or catch point into alignment with a protruding baseboard. Their thickness and placement are model-specific. A spacer is not simply a random wood block behind a screw; it changes which surface supports the bracket and how far its fasteners must reach. Read the installation instructions and confirm the supporting wall structure and fastener length required by the manufacturer. If an approved solution is unavailable, consider another gate rather than altering the bracket by drilling new holes.
Respect solid mounting surfaces
For hardware-mounted gates, the surface behind the brackets matters as much as the visible trim. North States states that its hardware-mounted pet gates require attachment to a solid support, such as a wooden stud, rather than drywall anchors. Other manufacturers may have different instructions, so read yours. Do not secure a high-load bracket solely to brittle molding, plasterboard, or crumbling trim. If you cannot identify a compliant attachment point, ask a qualified installer or choose a different barrier location. Stairs and fall hazards require particular care and a gate approved for that use.
Keep both posts upright and parallel
Before tightening anything, compare the upper and lower distances and ensure the posts align within the gate manufacturer’s tolerances. If the lower frame angles inward because it touches the baseboard, the door might bind or the upper latch may not close. Do not solve a crooked frame by bending the gate or increasing pressure until trim dents. Use the supplied alignment method and a level where the instructions call for it. Recheck closure after the final adjustments, especially if you moved a wall cup to another mounting height.
Watch the gap above the baseboard
An offset can create a wedge-shaped opening where the gate rail meets the wall or the lower bar passes over the floor. Examine the finished installation from your pet’s head height and at ground level. Small dogs may try to squeeze through or hook a paw under a raised frame. Also look for a sharp bracket edge or a screw tip exposed behind a decorative collar. The exact safe gap is not a universal number; compare it with the manufacturer’s requirements and the smallest animal using the area.
Account for the floor and threshold
Many walk-through gates have a bottom rail that people step over. A baseboard workaround should not raise that rail off the floor or put loose padding beneath it. Think about dark hallways, groceries, children, and anyone with mobility limitations. Mark the threshold visually only if doing so does not obstruct the gate or create something a pet can chew. If the doorway is a major traffic route, a compatible hardware-mounted design with a clearer walking path may be worth considering instead of a high step-over setup.
Inspect after settling and seasonal changes
Wood trim can shrink or expand, painted surfaces can wear, and pressure pads may leave marks as the gate settles. Check the contact points periodically for slippage, compression, cracks, or loose screws. Remove grit trapped between feet and walls only as directed, then recheck alignment and latch function. If the gate becomes easier to move by hand, stop using it until you identify the cause. Additional pressure is not automatically the solution; it can damage a decorative surface without restoring the structural support the gate needs.
When a new location is simpler
A different doorway just a few feet away may provide flat, solid surfaces and eliminate the need for offsets. Check whether moving the barrier would block an exit, cut off drinking water, trap one pet near another, or place a gate near stairs. The goal is safe separation, not maximizing the number of barriers installed. A freestanding gate may suit a calm dog in a low-risk room, but it is not equivalent to a secured gate against a persistent jumper or shoulder-pusher. Choose for the animal and the hazard.
Use a final doorframe inspection
Before the dog returns, inspect four things: every approved mount seats firmly, the frame remains level, the latch engages without forcing, and the floor and wall gaps do not invite climbing or entrapment. Then open the gate slowly from both sides and make sure the surrounding room door still has its required clearance. Photograph the approved mounting configuration for future reference. If a contact point depends on improvised spacers, unstable trim, or a bracket you cannot identify, the installation still needs correction. Stop and use the manufacturer’s support channel.
How We Research
For this guide, HubPet compared animal-welfare advice on pet gates with baseboards with documented mounting and part-compatibility guidance. We distinguish general safety principles from exact product specifications, which should always come from the relevant manufacturer manual. We reviewed these references on November 1, 2026. For HubPet’s editorial approach, see About HubPet.
Sources
North States MyPet — Pet Gate Installation FAQs. See the original source for its stated scope, limitations, and current model instructions.
American Kennel Club — Dog Gates 101. See the original source for its stated scope, limitations, and current model instructions.
Cardinal Gates — Gate Installation Guides. See the original source for its stated scope, limitations, and current model instructions.
Not always. Some models support approved spacer or mounting options, while others require a different doorway or gate type.
Only use a spacer or mounting method expressly approved by the manufacturer for that gate and support surface.
Do not assume decorative trim is structural. Follow the gate maker’s instructions for the required solid mounting location.
Uneven lower and upper contact widths may twist the frame. Recheck mounting geometry against the product manual.
Do not use one there unless the manufacturer expressly approves the specific model. For stair-top safety, manufacturers and safety guides generally favor suitable hardware-mounted gates.